BetaHub Blog
Implementing a Bug Report Form in Unity
September 25, 2024 · 16 min read
Are you looking for a way to implement a bug reporting form in your Unity game? Let me guide you on how to create one! It will be a step-by-step guide, so you can follow it easily.
Step 1: Setting Up the UI
Creating a bug reporting form in Unity is pretty straightforward using the Unity UI (uGUI) system. Let’s break down how to set up the interface that will allow users to submit detailed bug reports with ease.
If you are not familiar with Unity UI, and you want to learn the basics, you can check out this tutorial to get started.
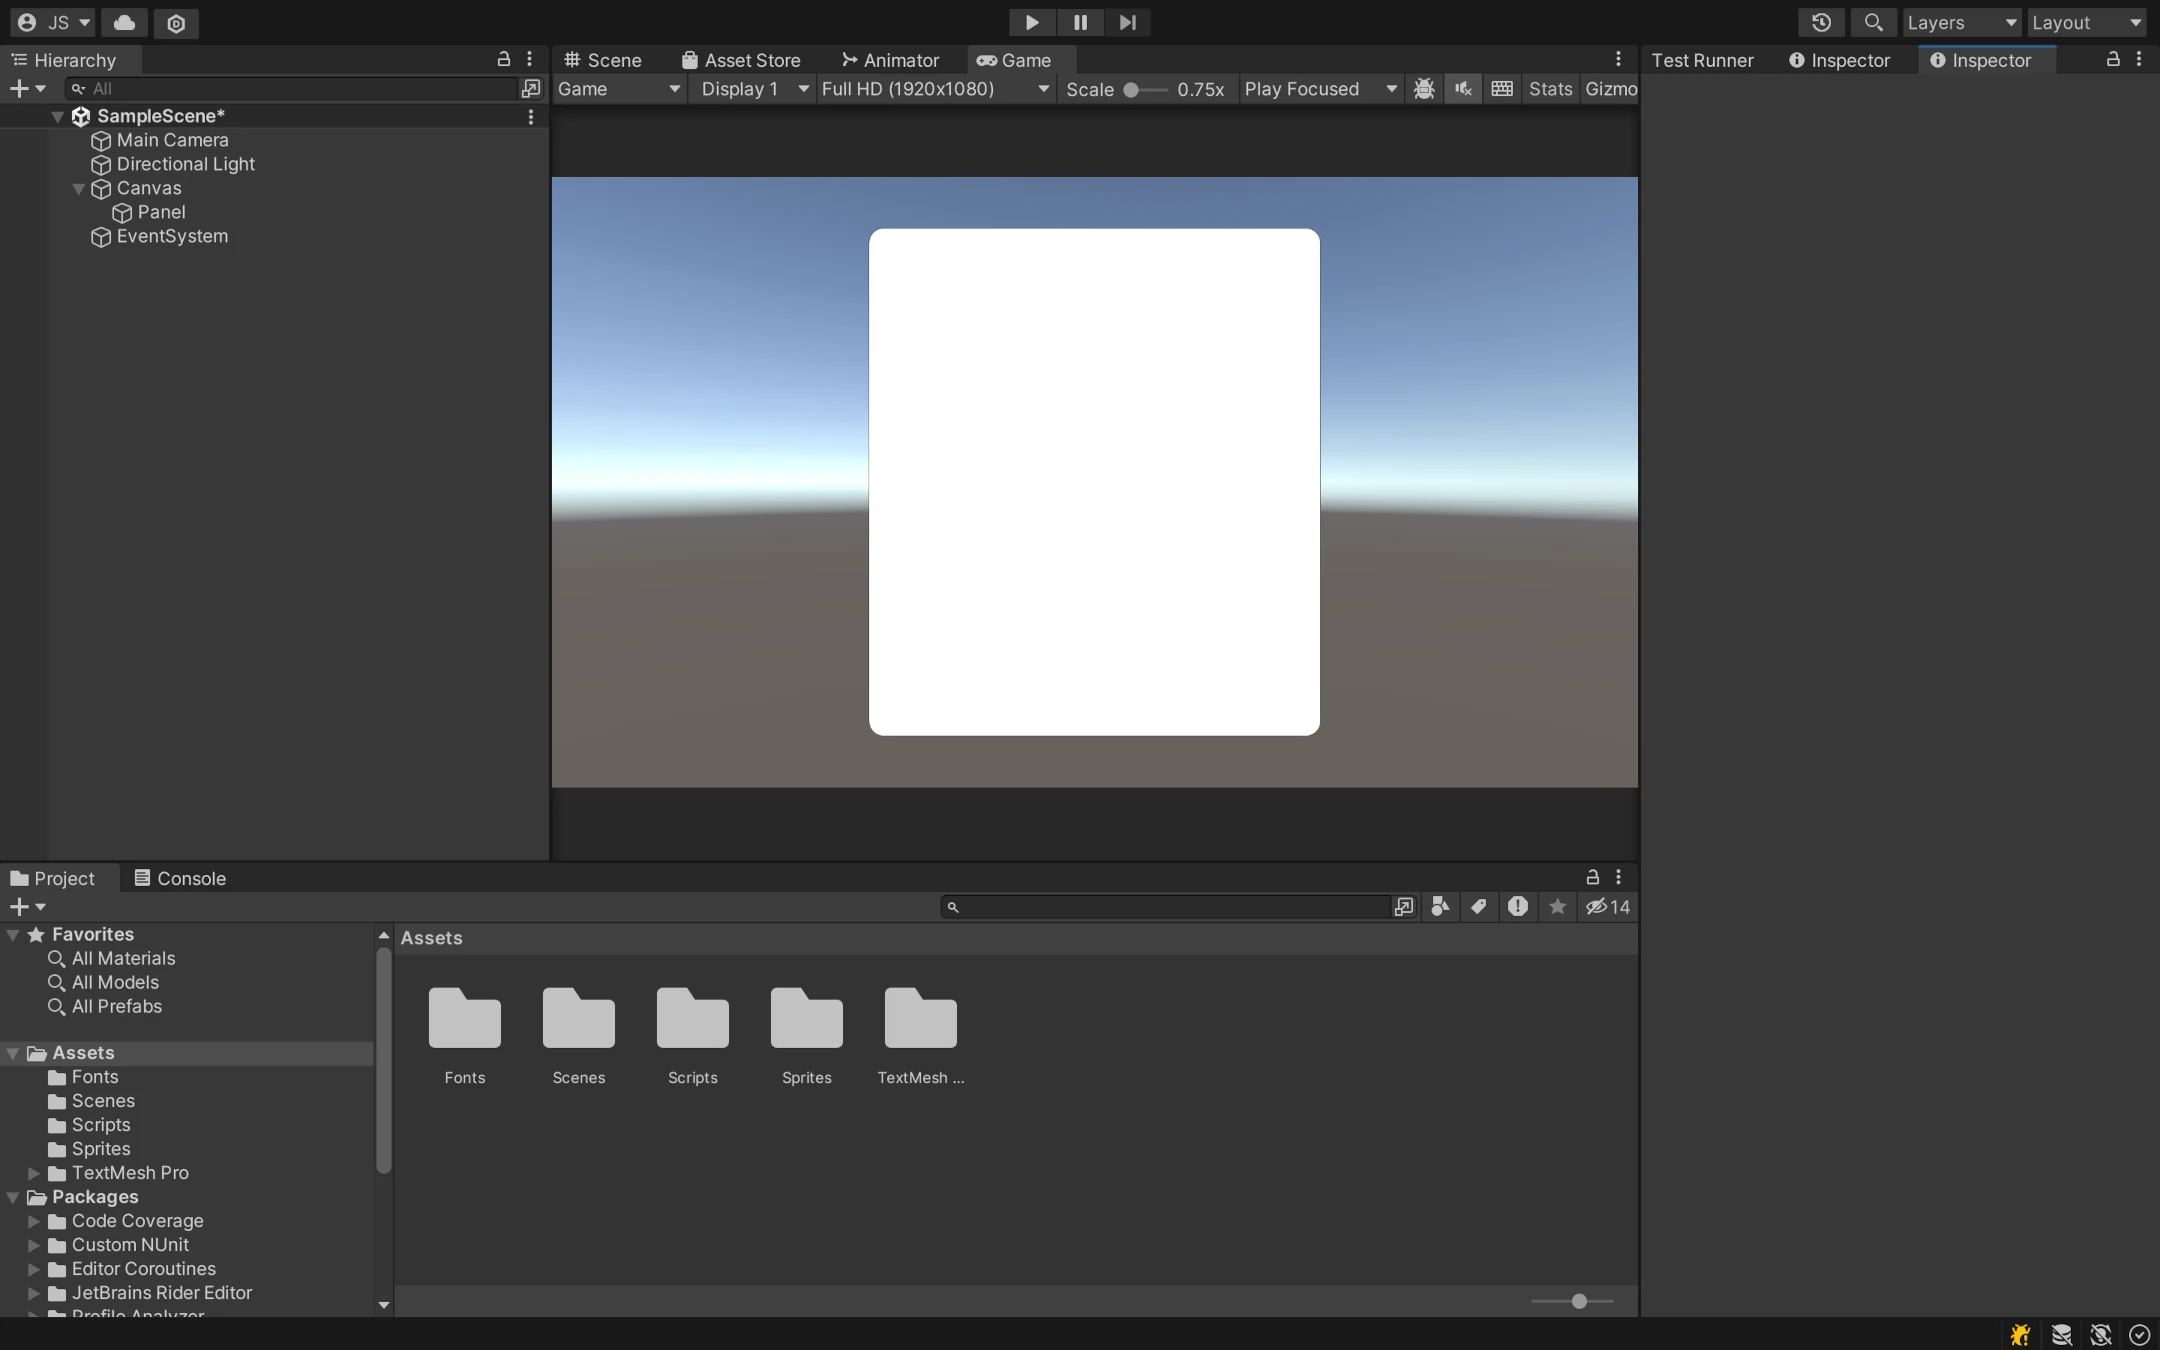
1.1 Create a New Canvas and Panel
Start by creating a new Canvas in your Unity scene. This canvas will serve as the container for all the UI elements that make up the bug reporting form. Once the canvas is in place, add a Panel to it. This panel will act as the background for the form, giving it a cohesive and structured look.
- Canvas: The container for UI elements.
- Panel: The background for the form, ensuring that UI elements stay organized.
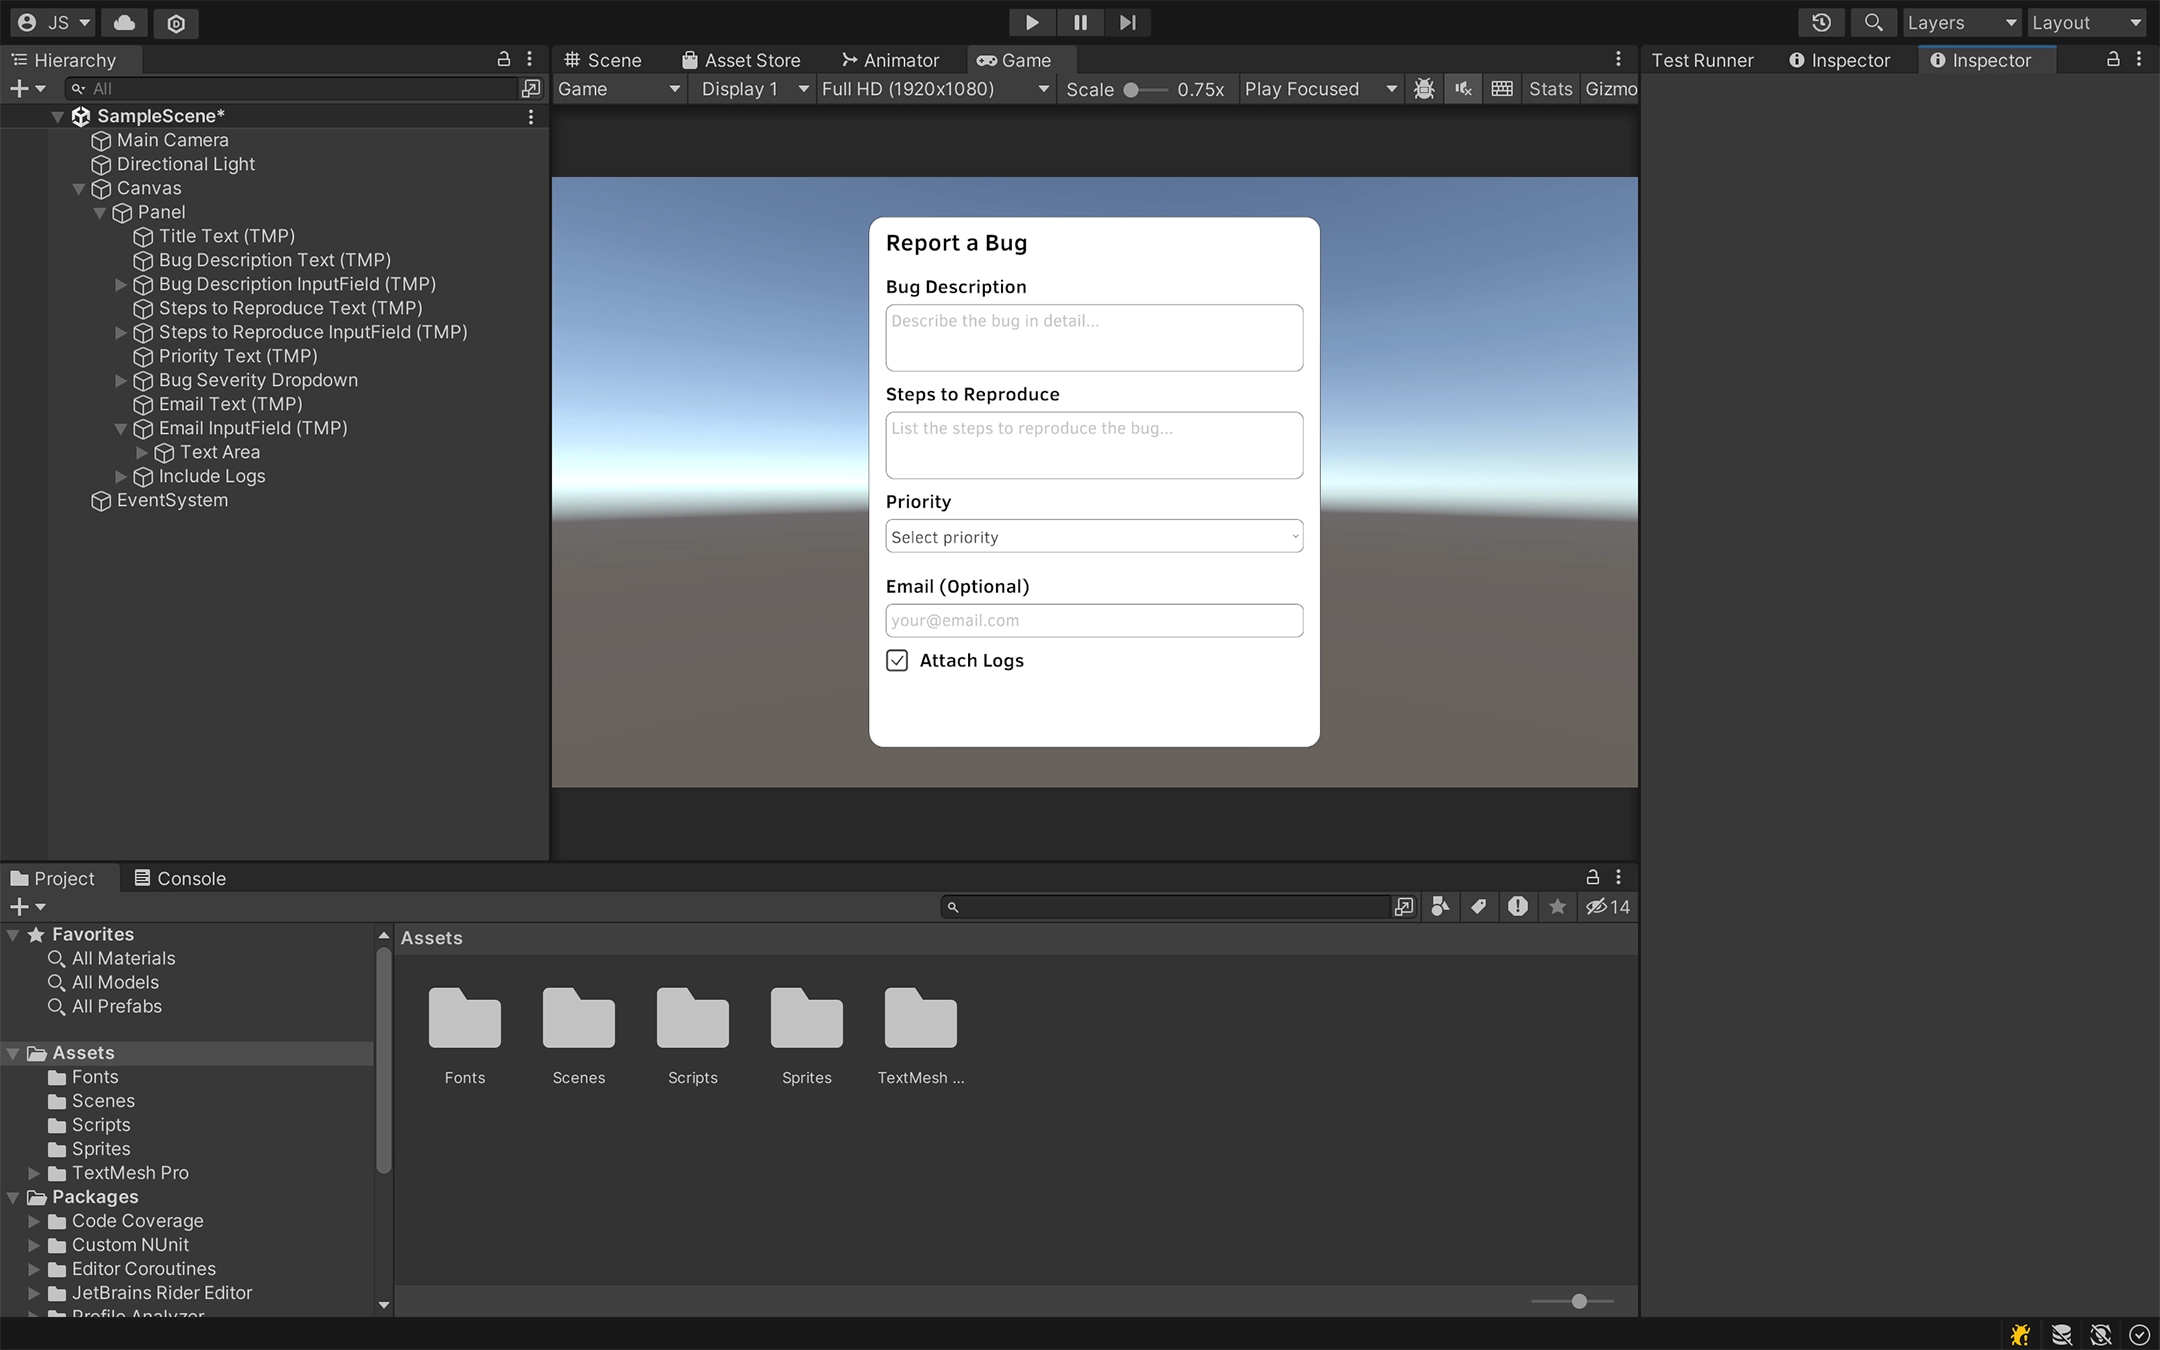
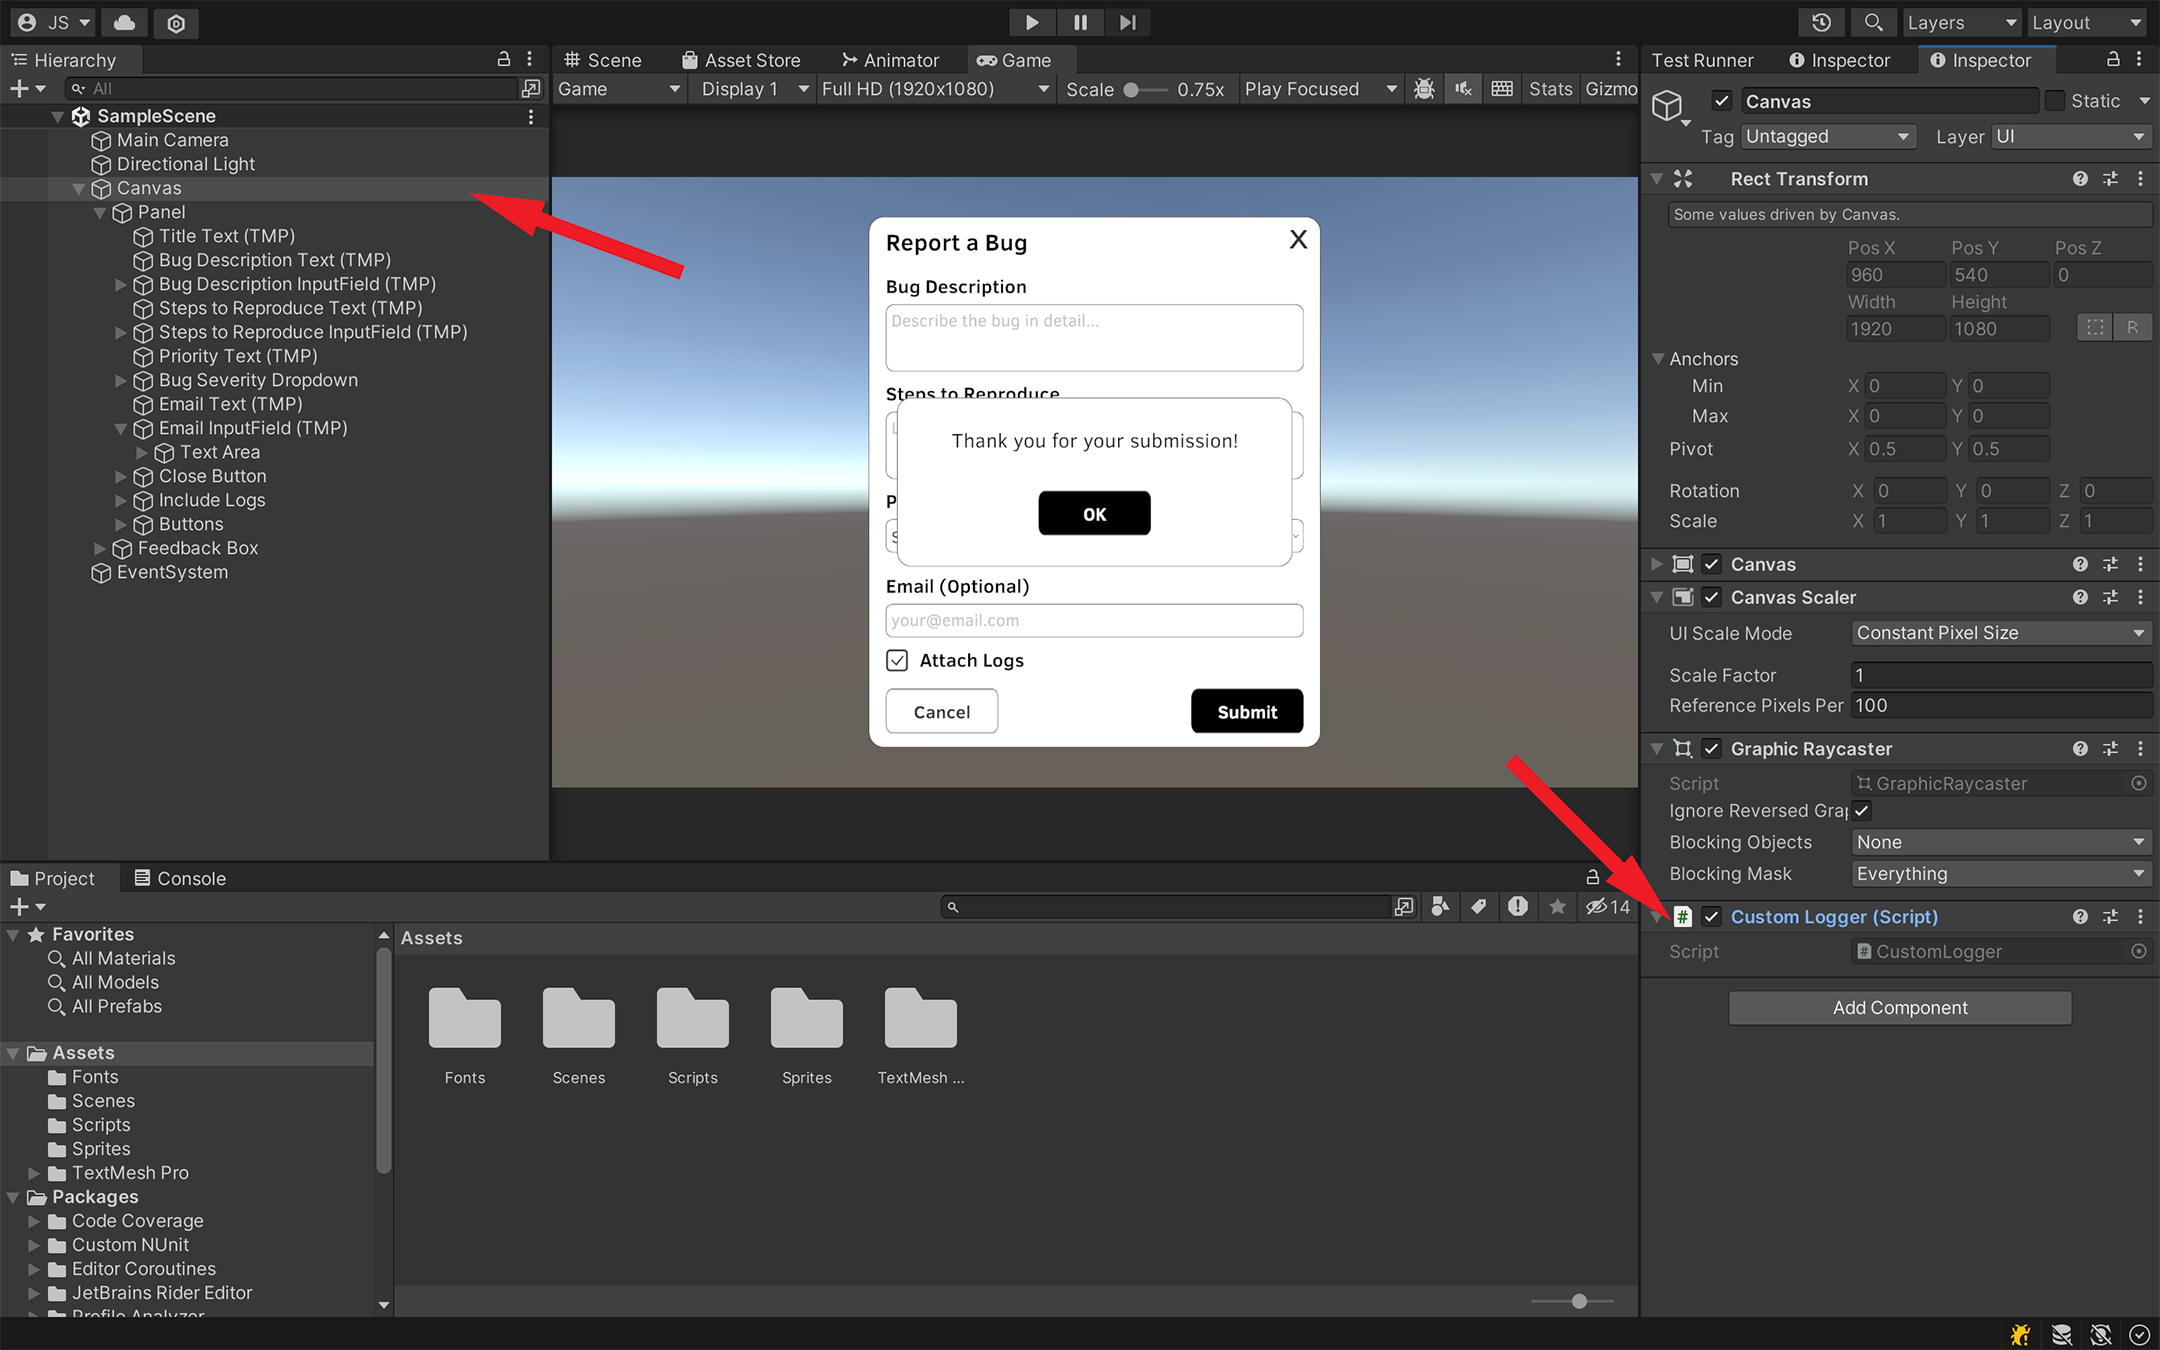
1.2 Add UI Components
Next, you’ll add some components for the form: text fields, input fields, and buttons. The key fields will be:
- Bug Description Field: A multi-line
InputFieldfor players to describe the bug. - Steps to Reproduce Field: A multi-line
InputFieldwhere players outline how to reproduce the bug. - Optional Email Field: A single-line
InputFieldfor testers to optionally leave their contact information. - Bug Severity Dropdown: A dropdown menu for users to select the severity of the bug (e.g., Low, Medium, High, Critical).
- Optional Logs Checkbox: A checkbox for users to choose whether to include logs in their report.
Of course you can add more fields if you need to, but these are the most common ones.
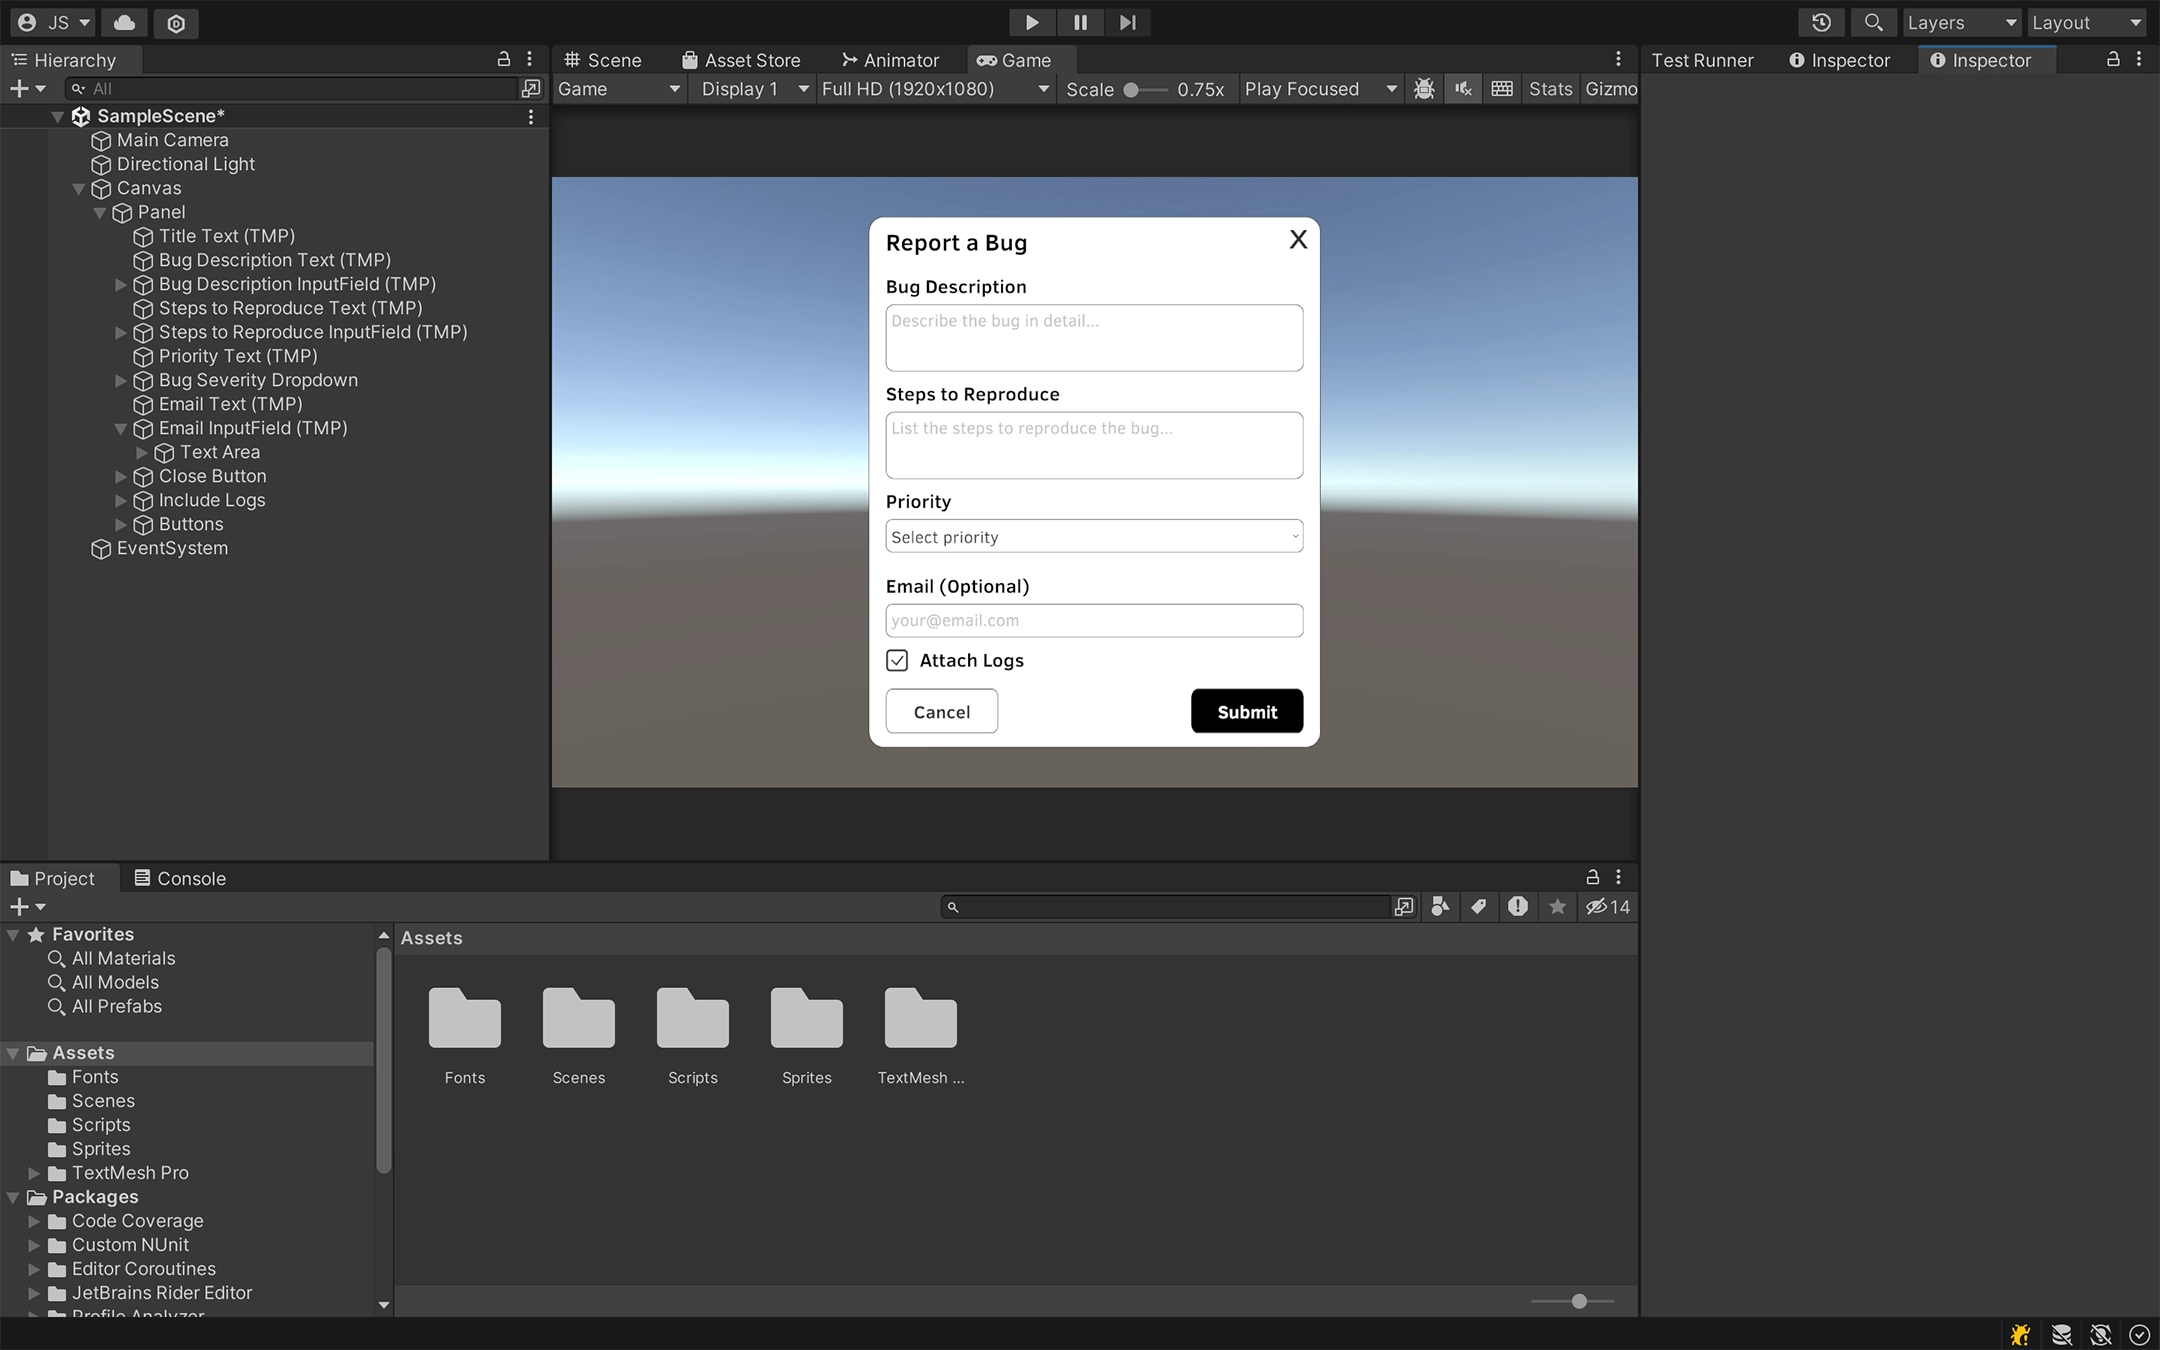
1.3 Add Action Buttons: Submit, Cancel, and Close
- Submit Button: Use this to send the bug report. When clicked, it will gather all the data from the input fields and send it to the server.
- Cancel Button: This allows users to clear the form and back out without submitting the report.
- Close Button: A small “X” button in the top-right corner to close the form, adding convenience for users who don’t want to fill it out.
You will be able to use Unity’s OnClick event for each button to trigger the appropriate actions when clicked.
Once your form is set up, it’s crucial to provide clear instructions for users on how to fill it out effectively. Consider adding a brief guide or tooltips for each field, explaining what kind of information is most helpful for developers. This will improve the quality of the bug reports you receive and make it easier to address issues.
1.4: Triggering the Bug Report Form
To make the bug report form easily accessible, consider implementing a keyboard shortcut or adding an option in your game’s pause menu. For example:
void Update()
{
    if (Input.GetKeyDown(KeyCode.F8))
    {
        ShowBugReportForm();
    }
}

void ShowBugReportForm()
{
    // Code to display the bug report form
}
Creating a Feedback Box for Form Submission
Before we move on, we must create one more widget. Once a user submits the bug report, it’s important to provide immediate feedback—either a success message thanking them for their submission or an error message if something goes wrong. Here’s how to create a simple feedback box in Unity.
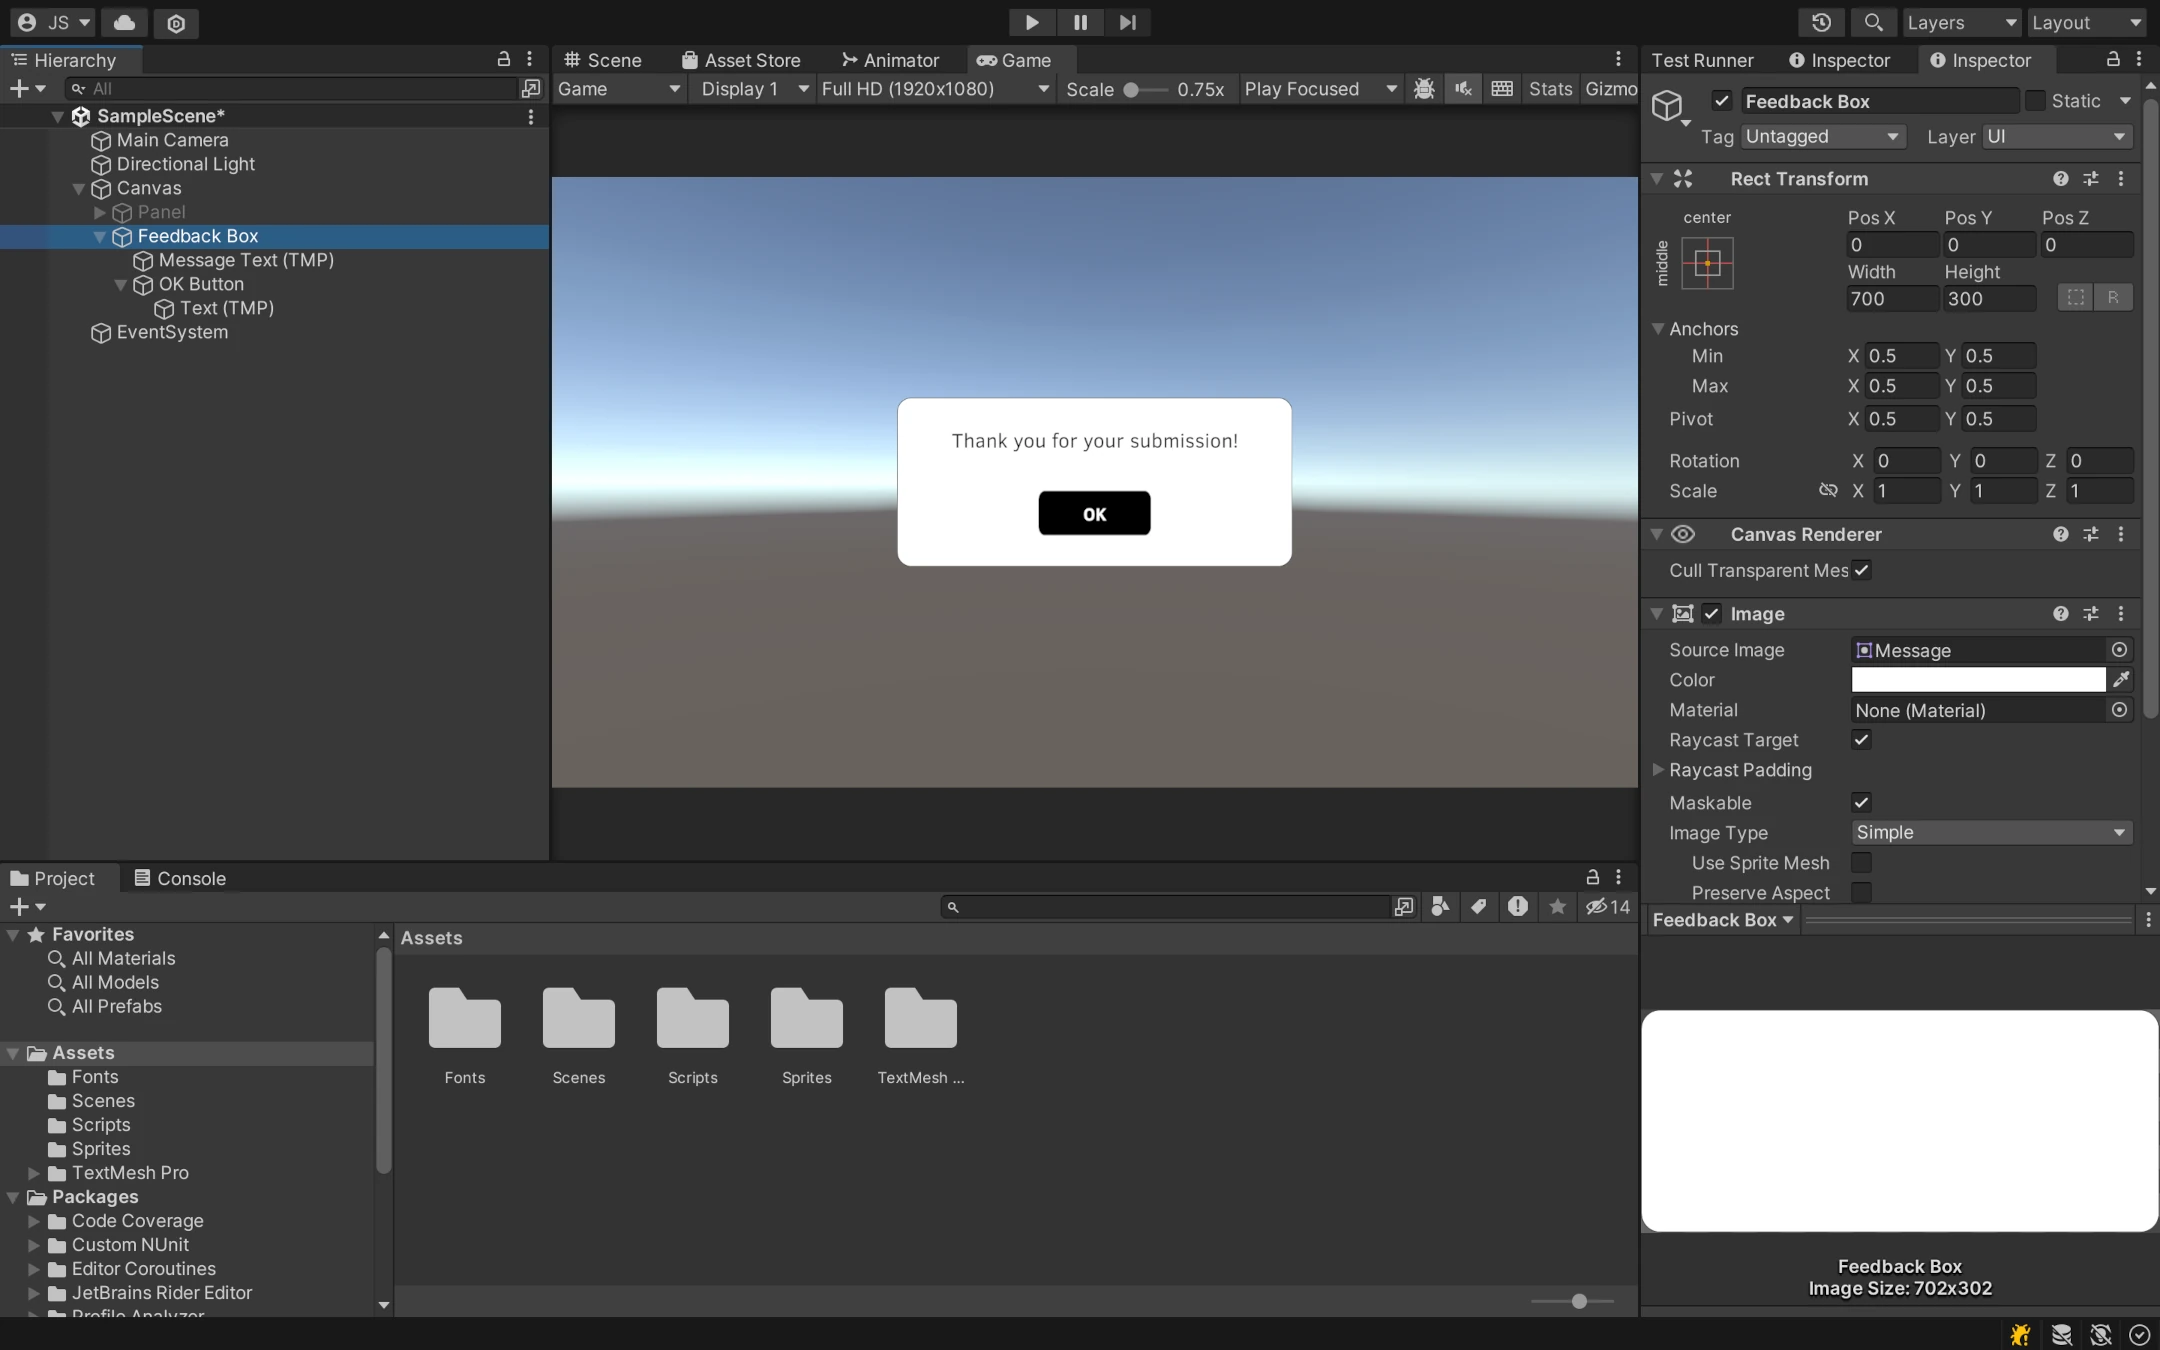
1.5. Create a Feedback Panel
- Add a new
Panelto the Canvas that will serve as the feedback box. This panel will be initially hidden and only displayed after submission. - Inside the feedback panel, add a
Textcomponent where you’ll display the success or error message. - Create two buttons on the feedback panel: one to close the message and return to the game, and another to retry in case of an error.
1.6. Show and Hide the Feedback Box
- After the player submits the form, check if the report was successfully sent. Based on the result, display either a “Thank you” message or an “Error” message.
- Use Unity’s
SetActive()method to control the visibility of the feedback panel.
For example:
public GameObject feedbackPanel; // Assign this via the Unity editor
public Text feedbackMessage; // Assign this via the Unity editor

void ShowFeedback(bool success)
{
    feedbackPanel.SetActive(true);
    if (success)
    {
        feedbackMessage.text = "Thank you for your submission!";
    }
    else
    {
        feedbackMessage.text = "Failed to submit the report. Please try again.";
    }
}

void HideFeedback()
{
    feedbackPanel.SetActive(false);
}
- When the player clicks the close button, call
HideFeedback()to return them to the game or reset the form.
Step 2: Attaching Logs to Bug Reports
When you receive a bug report, it’s essential to have as much information as possible to diagnose and fix the issue. The logs could be one of the most important parts of the report, as they can provide valuable insights into what went wrong. In this step, we’ll set up a system to automatically attach logs to the bug report.
While attaching all the logs is useful, it’s important to respect user privacy. Make sure you’re not capturing sensitive information in the logs, and allow users to opt-out of attaching logs if they prefer, for example, by using the checkbox we created in Step 1.
2.1 Setting Up a Custom Logger
Unity provides a convenient way to capture logs through the Application.logMessageReceivedThreaded callback. By implementing a custom logger, you can automatically capture and store logs in a file, which can then be attached to the bug report.
How it works:
- We’ll create a script that hooks into Unity’s log message callback.
- The script will write the logs into a separate file that can be read and attached later.
using System.IO;
using UnityEngine;

public class CustomLogger : MonoBehaviour
{
    private StreamWriter logFile;

    void OnEnable()
    {
        // Create or open the log file in the persistent data path
        logFile = new StreamWriter(new FileStream(Application.persistentDataPath + "/CustomPlayer.log",
                                                    FileMode.Append, FileAccess.Write, FileShare.Read));
        // Subscribe to the log callback
        Application.logMessageReceivedThreaded += HandleLog;
    }

    void OnDisable()
    {
        // Unsubscribe from the log callback and close the file
        Application.logMessageReceivedThreaded -= HandleLog;
        logFile.Close();
    }

    // This method is called whenever a log is received
    void HandleLog(string logString, string stackTrace, LogType type)
    {
        logFile.WriteLine($"{type}: {logString}\n{stackTrace}");
        logFile.Flush();
    }
}
Note the FileShare.Read flag in the FileStream constructor. This allows the log file to be read while it’s being written, which is useful for attaching logs to the bug report.
Note: Continuous log capture may have a small performance impact. Consider implementing a rolling log file or limiting the log size to mitigate this.
Finally, attach the script to your canvas.
Step 3: Submitting and Handling Form Data
Once the bug report form is filled out, and the player intends to submit the bug report, the next step is to gather all the information and handle the submission process. This involves collecting data from the input fields, optionally attaching logs, and sending everything to your backend server or saving it locally for later processing.
We won’t cover the backend part in this article as this is a bit out of scope. Still, we might do this in another one in the future.
3.1 Gathering Input Data
First, let’s define a structure to hold our bug report data:
public struct BugReportData
{
    public string description;
    public string stepsToReproduce;
    public string email;
    public string logs;
    public string severity;
}
When the user clicks the “Submit” button, we need to gather data from the description field, steps to reproduce field, and the optional email field. We’ll also check if the logs checkbox is selected to decide whether to attach logs (as done in Step 2).
Let’s start implementing the BugReportForm class with the fields and the CollectFormData() function:
public class BugReportForm : MonoBehaviour
{
    public InputField descriptionField; // Assign in the Unity editor
    public InputField stepsToReproduceField; // Assign in the Unity editor
    public InputField emailField; // Assign in the Unity editor
    public Toggle attachLogsToggle; // Assign in the Unity editor
    public Dropdown severityDropdown; // Assign in the Unity editor

    // Collect all input data
    BugReportData CollectFormData()
    {
        BugReportData reportData = new BugReportData();

        // Gather the data from input fields
        reportData.description = descriptionField.text;
        reportData.stepsToReproduce = stepsToReproduceField.text;
        reportData.email = string.IsNullOrEmpty(emailField.text) ? "N/A" : emailField.text;
        reportData.severity = severityDropdown.options[severityDropdown.value].text;

        // Attach logs if the checkbox is selected
        if (attachLogsToggle.isOn)
        {
            AttachLogFileToReportData(ref reportData);
        }

        return reportData;
    }

    // Method to attach logs to the bug report data
    void AttachLogFileToReportData(ref BugReportData reportData)
    {
        string logFilePath = Application.persistentDataPath + "/CustomPlayer.log";

        if (File.Exists(logFilePath))
        {
            // Read the log file content
            string logContents = File.ReadAllText(logFilePath);
            // Attach the log content to the report data
            reportData.logs = logContents;
            Debug.Log("Logs successfully attached to the report.");
        }
        else
        {
            Debug.LogWarning("Log file not found. Skipping log attachment.");
        }
    }
}
3.2 Submitting the Report
After collecting all the details, the next step is to submit the form. This involves sending the data to your backend server or saving it locally. It’s really up to you, but having it on the server is usually a better choice. Once the submission is processed, remember to provide feedback to the player (success or error message).
Here’s how you can trigger the form submission and handle the result (remember to add to already existing BugReportForm class body, do not replace it!)
public class BugReportForm : MonoBehaviour
{
    // (previous body goes here)

    public GameObject feedbackPanel; // Assign in the Unity editor
    public Text feedbackMessage; // Assign in the Unity editor

    public void SubmitReport()
    {
        if (ValidateInputs())
        {
            BugReportData reportData = CollectFormData();

            // Simulate sending the report to the server
            bool submissionSuccessful = SendReport(reportData);

            // Show feedback based on the result
            ShowFeedback(submissionSuccessful);
        }
    }

    // Simulate sending the bug report
    bool SendReport(BugReportData reportData)
    {
        Debug.Log("Sending bug report: " + reportData.description);
        // Logic to send the report to the server or save locally
        return true; // Return true if successful, false if failed
    }

    void ShowFeedback(bool success)
    {
        feedbackPanel.SetActive(true);
        if (success)
        {
            feedbackMessage.text = "Thank you for your submission!";
        }
        else
        {
            feedbackMessage.text = "Failed to submit the report. Please try again.";
        }
    }

    public void HideFeedback()
    {
        feedbackPanel.SetActive(false);
    }
}
3.3 Input Validation and Error Handling
It’s important to validate user inputs to ensure the quality of bug reports. Here’s a simple example of how to implement basic validation:
bool ValidateInputs()
{
    if (string.IsNullOrWhiteSpace(descriptionField.text))
    {
        ShowFeedback(false, "Please provide a bug description.");
        return false;
    }
    if (string.IsNullOrWhiteSpace(stepsToReproduceField.text))
    {
        ShowFeedback(false, "Please provide steps to reproduce the bug.");
        return false;
    }
    return true;
}
Call this method before submitting the report to ensure all required fields are filled.
Bonus Step: Collecting Screenshots for Context
Now that we have our basic bug reporting system in place, let’s explore an additional feature that can greatly enhance the quality of bug reports: screenshot capture.
In addition to logs, having a screenshot of the issue is a big help to the developer who tries to understand what the player has seen. However, screenshots should be captured before the bug report dialog opens, ideally just before any additional UI (such as the pause menu) appears or when the user initiates the bug report. Otherwise, instead of capturing the issue, we will capture the UI covering the view.
We won’t cover how exactly you should implement your code to make this possible, but provide you some useful code snippets to help you on the road.
1. Capturing the Screenshot in Unity
To capture a screenshot, Unity provides a simple function: ScreenCapture.CaptureScreenshot(). This function saves the screenshot to a file, which can then be attached to the bug report.
public class ScreenshotCapture : MonoBehaviour
{
    private string screenshotPath;

    // Call this before the bug report dialog opens (e.g., from the pause menu)
    public void CaptureScreenshot()
    {
        screenshotPath = Application.persistentDataPath + "/screenshot_" + System.DateTime.Now.ToString("yyyyMMdd_HHmmss") + ".png";
        ScreenCapture.CaptureScreenshot(screenshotPath);
        Debug.Log("Screenshot captured at: " + screenshotPath);
    }

    // Method to retrieve the screenshot path for attaching to the report
    public string GetScreenshotPath()
    {
        if (File.Exists(screenshotPath))
        {
            return screenshotPath;
        }
        else
        {
            Debug.LogWarning("Screenshot file not found.");
            return null;
        }
    }
}
2. Attaching the Screenshot to the Bug Report
Once the screenshot is captured, you’ll want to attach it to the bug report data before submission. Similar to how logs were handled, the file path for the screenshot can be included in the bug report.
Here’s how to add the screenshot file to the bug report data:
public void AttachScreenshotToReportData(ref BugReportData reportData, ScreenshotCapture screenshotCapture)
{
    string screenshotFilePath = screenshotCapture.GetScreenshotPath();

    if (!string.IsNullOrEmpty(screenshotFilePath))
    {
        // Attach the screenshot path to the bug report data
        reportData.screenshotPath = screenshotFilePath;
        Debug.Log("Screenshot attached: " + screenshotFilePath);
    }
    else
    {
        Debug.LogWarning("Screenshot not attached.");
    }
}
3. Updating the Bug Report Data Structure
Since we are now including the screenshot, make sure your bug report data structure includes a field for the screenshot file path:
public struct BugReportData
{
    public string description;
    public string stepsToReproduce;
    public string email;
    public string logs;
    public string severity;
    public string screenshotPath; // Path to the screenshot file
}
Conclusion
And here it is! I hope this article helps you to create your own bug or feedback submission form in Unity.
As everything you see here has been created based on our experience, feel free to check out BetaHub Unity Plugin as this is our implementation. It’s on MIT license, therefore you’re free to fetch the code, modify and use it however you like!
Before releasing your bug reporting system, make sure to thoroughly test it in various scenarios. This includes testing with different types of bugs, ensuring the form submits correctly, and verifying that logs and screenshots are properly captured and attached.
If you have any questions about the article, or if you see any errors, join our Discord server and leave a message!
Join for free today
Supercharge your team with the best bug tracking and player feedback tools. No credit card required, forever free.
Our Mission
At BetaHub, we empower game developers and communities with an engaging platform for bug submission. We foster collaboration, enhance gaming experiences, and speed up development. BetaHub connects developers, testers, and players, making everyone feel valued. Shape the future of gaming with us, one bug report at a time.


2026 © Upsoft sp. z o.o.