Surveys
Surveys let you ask your testers structured questions and see the answers in one place. Instead of only waiting for bugs and suggestions to arrive, you can proactively ask things like “How did the new build feel?” or “Which area needs the most work?” — then read the results as a clear, per-question breakdown.
How It Works
- Create a survey — Add your questions using a mix of types: rating scales, multiple choice, yes/no, free text, and more.
- Send it to your testers — Everyone on your project with the Tester role gets notified.
- Testers answer — They fill it in from a simple web page linked in their notification.
- Read the results — A dashboard shows how many replied and breaks down every answer.
You can send a survey to your invited testers, open it up through a public link that anyone can answer, or both.
Enabling Forms & Surveys
Surveys — together with hosted feedback forms — live in a single Forms & Surveys module. New projects have it enabled by default, so a **Forms & Surveys** entry is already in the sidebar.
If you don’t see it — an older project, or the module was turned off — switch it back on:
- Open your project and go to Settings → General.
- Under Features & Modules, check Forms & Surveys.
- Save your settings.
Turning the module off hides the whole Forms & Surveys area — both surveys and hosted forms. Managing surveys is available to Developers and project admins — testers can’t create or manage surveys, they only take part in the ones sent to them.
Creating a Survey
- Open Forms & Surveys from the sidebar and create a new survey with a title.
- Use Add question to build your questionnaire.
The survey builder is organized into three tabs — Questions, Design, and Share — with a Live preview docked beside them that shows the public page as you edit.
Each question can be one of several types:
| Type | Best for |
|---|---|
| Short answer | Open-ended written feedback |
| Single choice | Picking exactly one option |
| Multiple choice | Picking any number of options |
| Yes / No | A simple two-way question |
| Rating scale | A score on a range you set (for example 1–5 or 1–10) |
| Number | A numeric answer |
| Date | A specific date |
The type dropdown labels these by their internal names (for example, Rating scale appears as Scale, and Short answer as Text), but the behavior is the same.
Each question also supports a few extras:
- Required — mark a question so testers can’t submit until they answer it.
- Image — attach a picture to a question (a screenshot of the area you’re asking about, for instance); testers can click it to open it full-size.
- Range — for a rating scale, set the lowest and highest values yourself instead of always using 1–10.
For single- and multiple-choice questions, add each option in the choices editor. You can add, edit, and remove options at any time, and drag questions or choices by their handle to reorder them.
Sending to Testers
When your survey is ready, choose Send to all testers. This sends it to everyone on the project with the Tester role and starts tracking responses as a wave.
Each tester is notified two ways:
- An in-app notification (the bell in the top bar), which always appears.
- An email with a link to the survey — unless the tester has turned off survey emails in their notification settings.
You can send the same survey more than once. Each send is a separate wave, so results from a later build stay separate from those of an earlier one.
Reminding Non-Responders
Testers get busy. Choose Remind non-responders to re-notify every tester who was invited but hasn’t finished yet — across every wave you’ve sent. Testers who already completed the survey are skipped.
Customizing the Public Page
The survey’s public page can match your game’s look. On the builder’s Design tab you can set a public title and intro text (shown to people answering the link, separate from the internal survey name), an accent color, a theme (Visitor choice, or force Light or Dark), a logo, and a full-width banner across the top. The Live preview shows every change before you save.
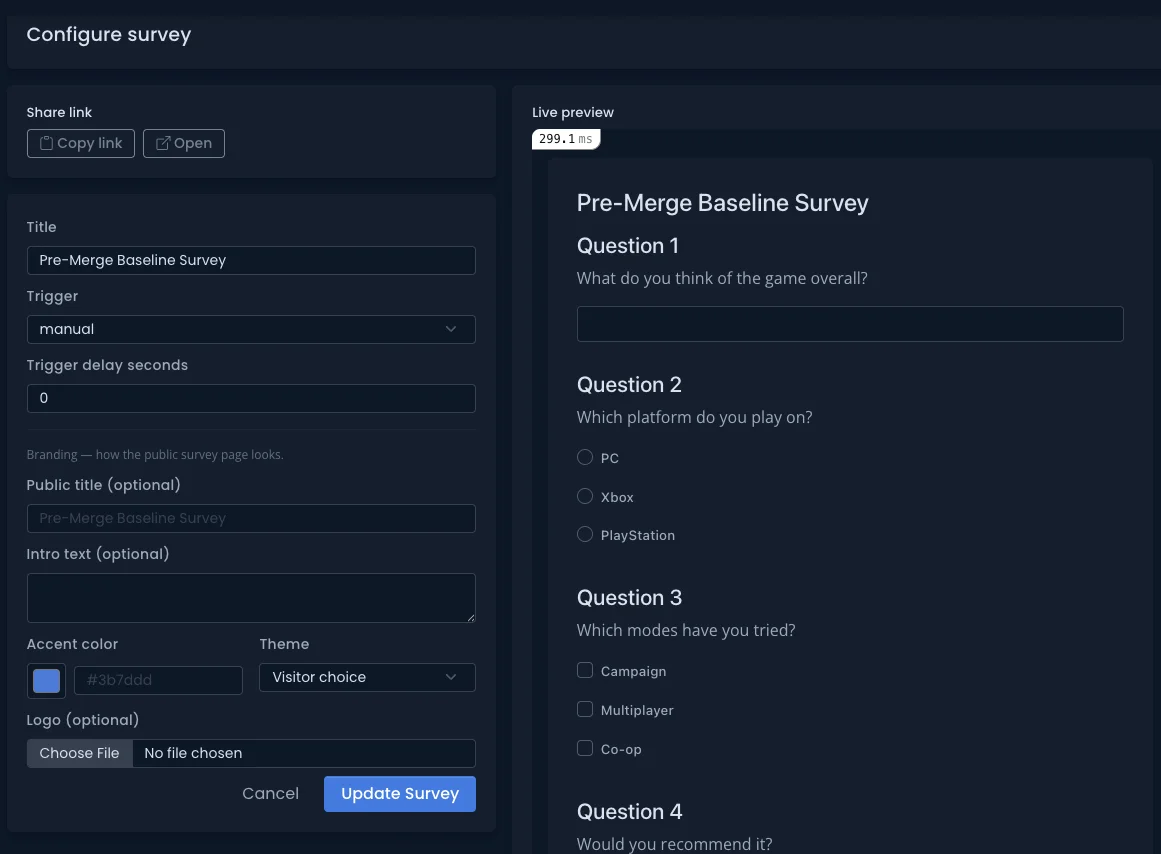
The Powered by BetaHub line at the bottom of the public page can be hidden on plans that include custom branding.
Sharing a Public Link
Sometimes you want answers from beyond your invited testers — a wider community on Discord, a mailing list, or anyone who follows your game. Any survey can also be opened as a public link: a URL anyone can open and answer, with no BetaHub account or tester invite required.
On the builder’s Share tab, choose how open the link should be:
- Off — no public link (the default).
- On — require sign-in — anyone with the link can answer, but must sign in first, so every response is attributed to an account.
- On — allow anonymous — anyone with the link can answer without an account. They can still choose to sign in first to have their response attributed.
Once it’s enabled, copy the shareable URL and post it wherever your audience is. The link only accepts responses while the survey is published — closing the survey, or switching the mode back to Off, stops it immediately.
When the link requires sign-in, the person stays on your branded survey the whole time: a sign-in box opens right over the page, and after they sign in (or create an account) they land back on the same survey with anything they’d already typed still in place — never bounced off to an unrelated page.
After someone submits, the thank-you page links back to your project page whenever the project is public. And if the person is signed in and not a member yet, it also offers them a one-click way to join the project — an easy path from “answered a survey” to “following your game.”
Need to retire a link you’ve already shared? Choose Regenerate link to swap in a fresh URL; the previous one stops working right away.
A survey can also be bundled together with your feedback forms into a hub — one branded link that presents several forms and surveys together.
Public links — especially anonymous ones — are best for gauging sentiment, not for anything you’d defend in a dispute. There’s a light guard against accidental double-submits, but no invite list behind a public link, so treat the results as a pulse rather than a ballot.
Reading the Results
Open a survey to see its results dashboard.
The delivery funnel at the top shows, at a glance:
- Sent — how many testers received it
- Opened — how many opened the survey
- Completed — how many finished
- Completion rate — the share who completed it
Per-question breakdown — every question is summarized in the way that fits its type:
- Rating scales show the average plus a distribution of scores.
- Single-choice and yes/no questions show each option’s share.
- Multiple-choice shows how often each option was picked.
- Free-text answers are listed alongside the tester who wrote them.
Individual responses — a table lists each tester, whether they completed, opened, or haven’t opened the survey, and a link to view their full set of answers.
If you sent the survey in more than one wave, use the wave switcher near the survey title to view each wave’s results separately.
Responses that arrive through the public share link appear under their own Public link entry in that same switcher. Because there’s no invited audience to measure against, it shows response counts — total, anonymous, and signed-in — instead of a delivery funnel, and folds those answers into the same per-question breakdowns. Anonymous answers are attributed to Anonymous.
Editing and Removing Questions
You can edit a question’s wording, type, or choices at any time from the survey builder’s Questions tab. Removing a question hides it from new responses but keeps any answers already collected — so your past results stay intact.
See Also
- Sentiment Analysis – Understand how your community feels from their everyday chatter
- Managing Feedback – Triage and workflow best practices for the feedback you collect
- Core Features – Status tables, file formats, and specifications
- Feedback Forms – Branded public forms for bugs, suggestions, and tickets