Advanced Features
Discover BetaHub’s AI-powered features that provide deeper insights into your game’s community and feedback.
Support Knowledge Base
Transform your support workflow with an AI-powered knowledge base that provides instant solutions.
How It Works
The knowledge base automatically responds to support requests by:
- Searching internal documentation
- Providing relevant solutions before ticket creation
- Reducing support team workload
- Enabling self-service problem resolution
Setting Up Knowledge Base
- Enable Support Knowledge in Settings / General
- Access Knowledge Base menu item
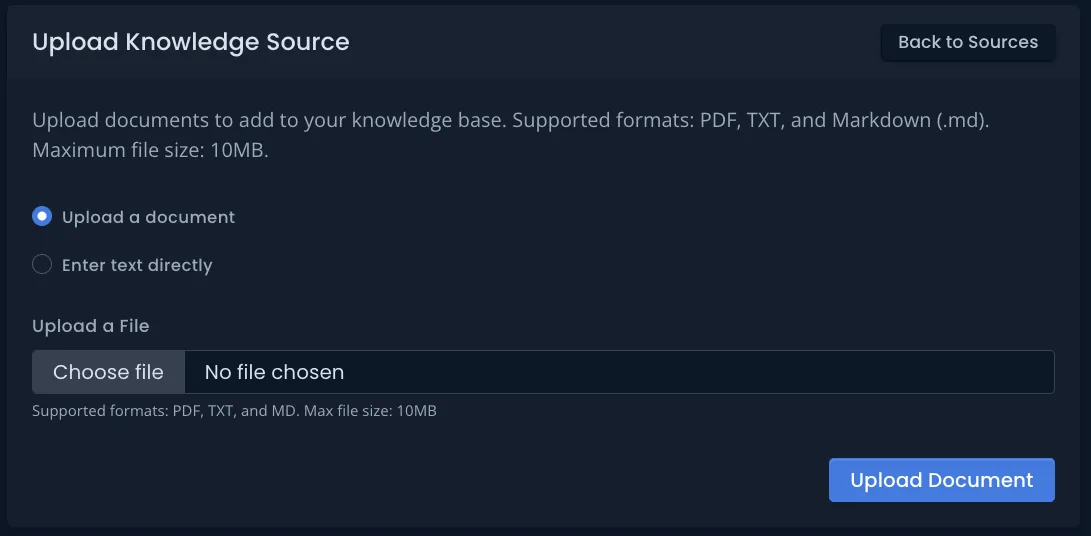
- Upload documentation via Upload New Document
Supported Formats:
- PDF documents
- TXT files
- Markdown (MD) files
- Direct text paste
Content Guidelines
Create effective knowledge base articles with:
- Troubleshooting steps for common problems
- Clear self-help instructions for users
- Standard responses used by support agents
- Concise, relevant information grouped logically
Category-Based Organization
BetaHub organizes knowledge into two categories to provide more relevant responses:
Technical Support - For bugs, errors, and technical issues:
- Installation problems
- Crashes and error messages
- Performance issues
- Account and login problems
- Game won’t start or load
Gameplay Questions - For game mechanics and how-to-play:
- How features work
- Game mechanics explanations
- Strategy and tips
- Controls and commands
- Game rules and objectives
How It Works: When users ask questions, AI automatically classifies them as either Technical or Gameplay. The system then searches only the relevant category, providing more accurate and focused answers.
Setting Categories: When uploading documents or adding knowledge sources, select the appropriate category:
- Choose Technical for troubleshooting guides and technical documentation
- Choose Gameplay for game manuals, feature explanations, and how-to guides
This categorization helps reduce noise and ensures users get answers from the right knowledge sources.
Using Bug Comments as Knowledge
Convert effective bug solutions into knowledge base articles:
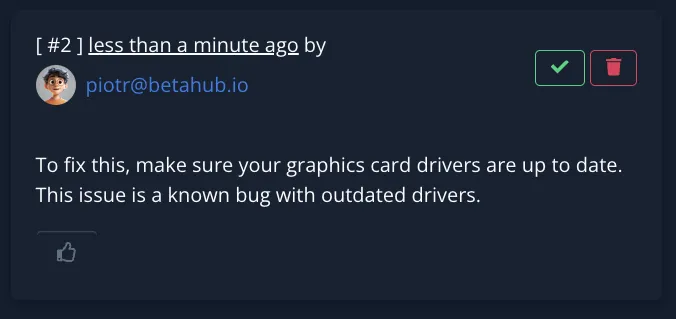
Click the green checkmark on helpful comments to:
- Mark comment as bug solution
- Add to knowledge base automatically
- Prevent duplicate support requests
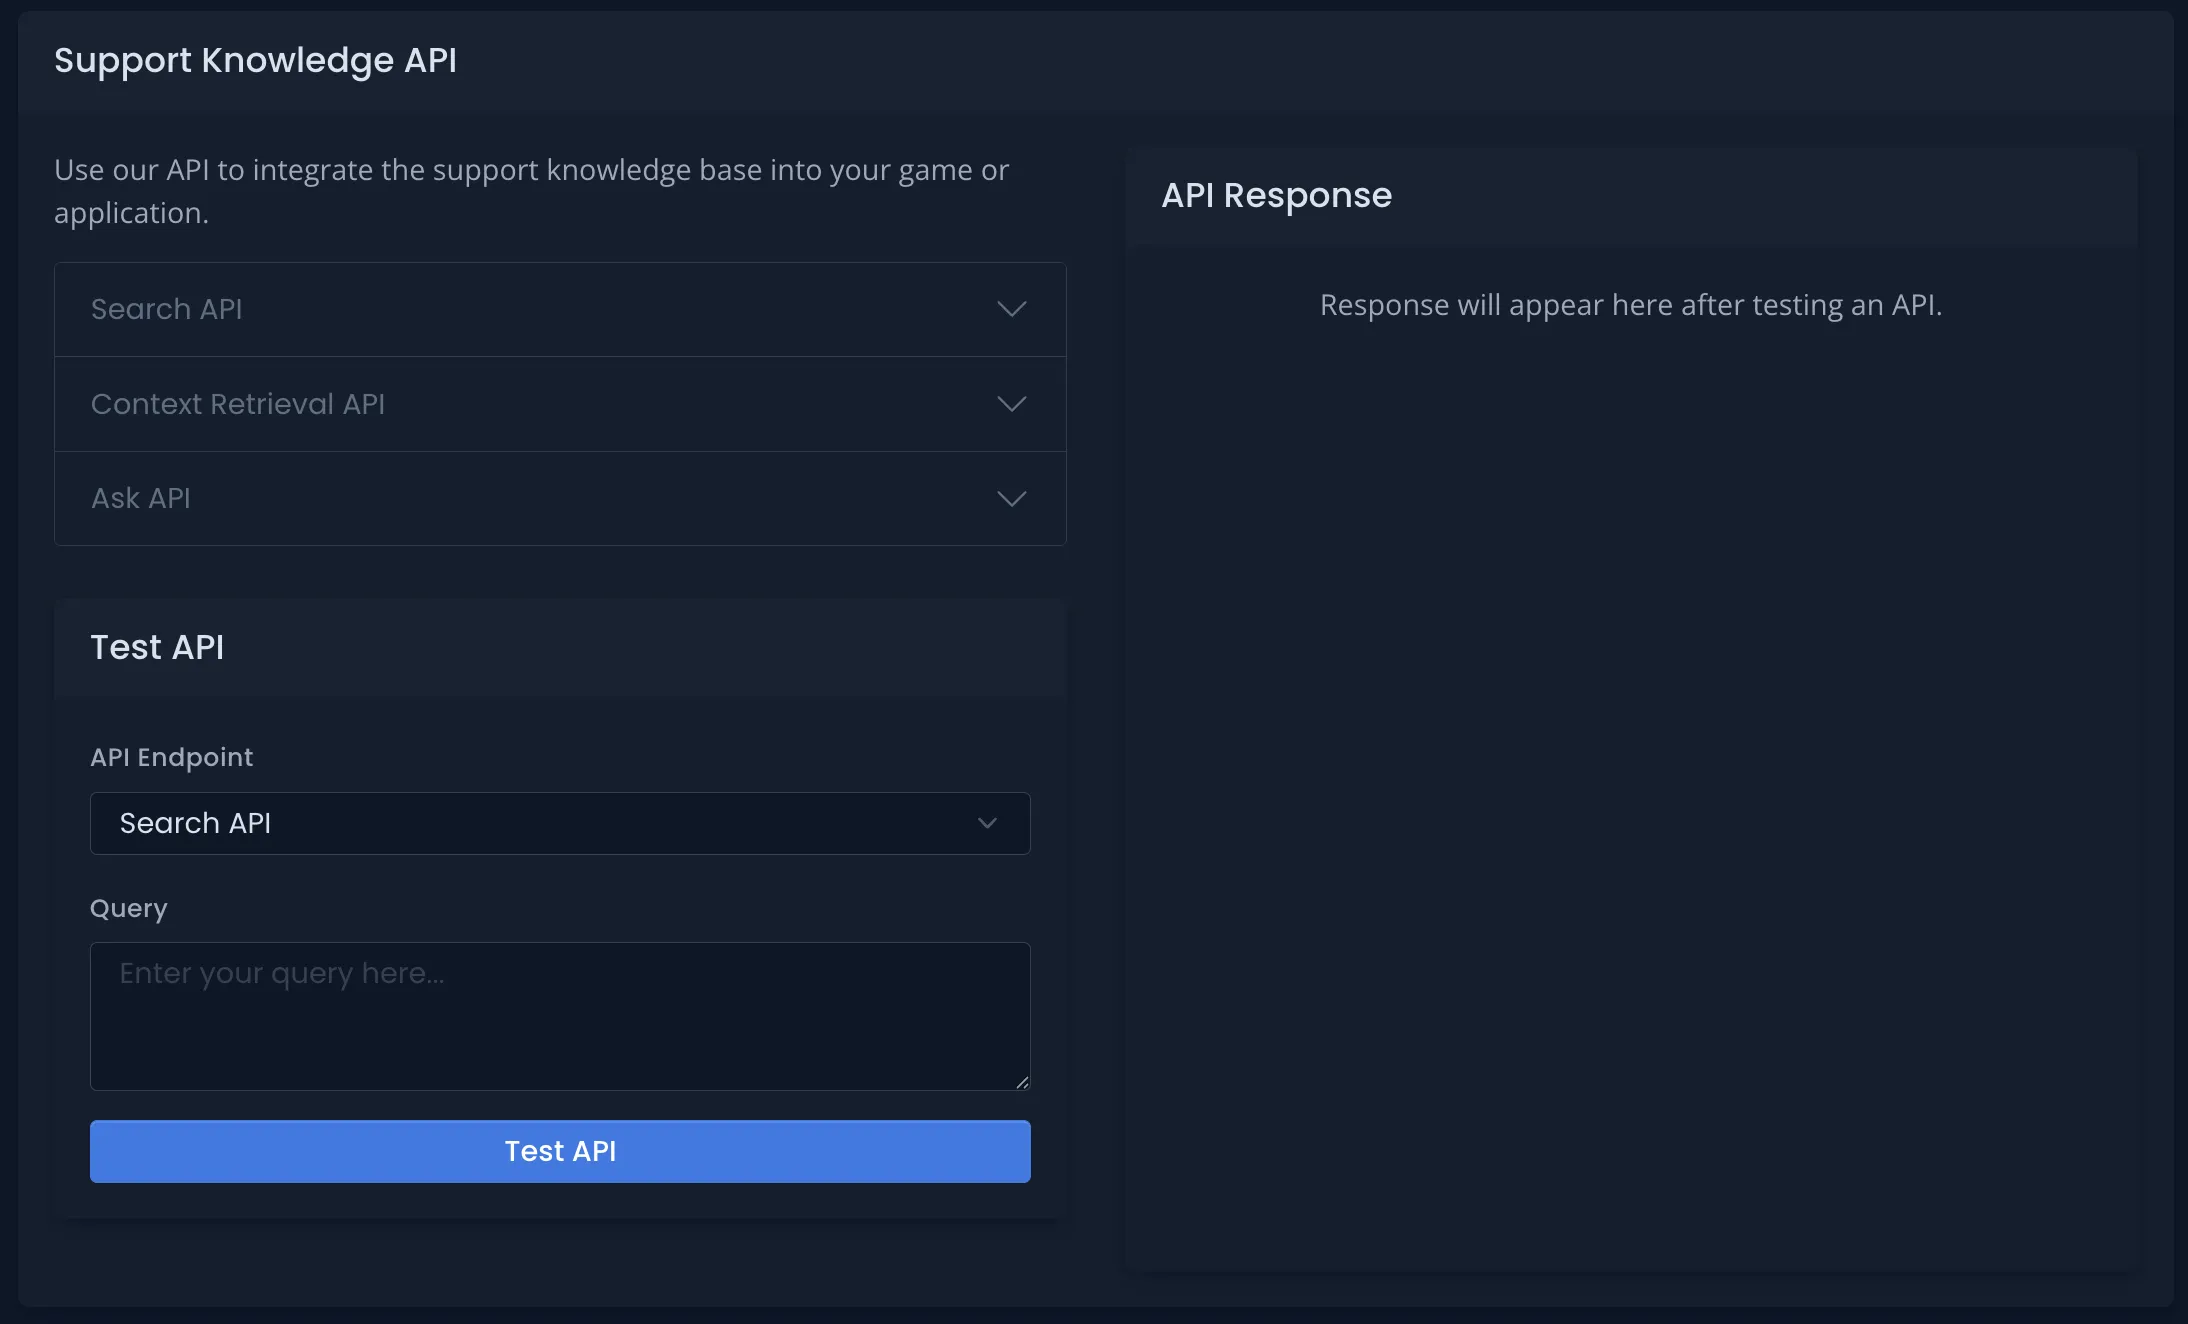
Testing and Validation
Test your knowledge base effectiveness:
Search API Testing:
- See what results return for queries
- Validate search accuracy
- Identify content gaps
Context Retrieval Testing:
- Review what context is provided to AI
- Ensure relevant information is accessible
Ask API Testing:
- Preview user-facing responses
- Test answer quality and helpfulness
Canned Responses
Speed up common support interactions with pre-configured automatic responses that trigger before knowledge base search.
What Are Canned Responses?
Canned responses are instant, automatic answers to frequently asked questions. When a user’s question matches a canned response, BetaHub immediately provides the pre-written answer without searching the knowledge base. This saves AI costs and provides faster responses for common scenarios.
When to Use Canned Responses:
- Frequently asked questions with consistent answers
- Important announcements (server maintenance, known issues)
- Quick redirects to specific resources
- Standard policy responses
Two Types of Canned Responses:
1. Question Similarity Matching
- Provide example questions that should trigger this response
- Uses AI to detect similar phrasing and intent
- Best for questions asked in various ways
- Example: “How do I reset password?” matches “I forgot my password” and “Can’t login”
2. Rule-Based Matching
- Define custom rules for when to trigger the response
- More flexible but requires clear rule definition
- Best for complex conditions or specific scenarios
- Example: “Questions about account deletion or GDPR”
Creating Canned Responses:
- Navigate to Knowledge Base → Canned Responses
- Click New Canned Response
- Select response type (Question Similarity or Rule-Based)
- Write your response text
- Add example questions (for similarity) or define rules (for rule-based)
- Set priority (higher priority responses are checked first)
- Save and activate
Best Practices:
- Keep responses concise and actionable
- Include links to relevant resources
- Use clear, friendly language
- Test responses with the API Testing tool
- Set higher priority for critical announcements
- Review and update responses regularly
Priority System:
Canned responses are checked in priority order (highest first). If multiple responses could match, the highest priority active response is used. This lets you:
- Prioritize urgent announcements over standard FAQs
- Create general responses with low priority as fallbacks
- Temporarily promote specific responses during events
Response Footer Messages
Add custom footer text to all knowledge base responses to guide users to additional resources.
What Are Footer Messages?
Footer messages appear at the end of knowledge base responses, providing consistent links to support channels, forums, or other resources. They help direct users who need additional help beyond the AI-generated answer.
Configuring Footer Messages:
- Navigate to Knowledge Base → Settings
- Enter your footer text in the Footer Text field
- Choose when to display the footer:
- Show footer when answer is found - Appears with successful responses
- Show footer when no answer is found - Appears when knowledge base has no solution
- Enable both to always show the footer
- Disable both to hide the footer (but keep the text saved)
Example Footer Messages:
Need more help? Join our Discord: https://discord.gg/yourgame
Or visit our support forum: https://forum.yourgame.com
Still stuck? Contact support at support@yourgame.com
Check our FAQ: https://yourgame.com/faq
Best Practices:
- Keep it brief (1-3 lines maximum)
- Include 1-2 most relevant support channels
- Use direct links (no link shorteners)
- Match your community’s tone
- Update when support channels change
When to Show Footer:
- On Answer Found: Good for providing additional resources even when AI helps
- On No Answer Found: Useful to direct users when knowledge base can’t help
- Always: Consistent user experience, always know where to get more help
- Never: Use when testing or preparing content before launch
Response Personality
Control the tone and style of AI-generated answers without affecting factual accuracy. The AI always draws its answers from your knowledge base — the personality setting only changes how those answers are worded.
To configure: Go to Support Knowledge → Settings → Response Personality and enter style instructions (up to 500 characters).
Example instructions:
| Instruction | Effect |
|---|---|
Be very casual and use gaming slang |
Relaxed, community-friendly tone |
Be formal and professional |
Corporate support style |
Use short, punchy sentences. Add humor where appropriate. |
Snappy, fun responses |
Respond as if you're a friendly NPC guide in the game |
In-character immersive answers |
Tips:
- Leave it blank for a neutral, helpful default tone
- Be specific — “respond like a pirate captain” works better than “be fun”
- The personality applies to all channels: web widget, Discord bot, and API
- It only affects wording — factual content always comes from your knowledge base
Knowledge Gaps Analysis
Identify and address missing information:
- Gap Detection - Queries with incomplete results
- Resolution Tracking - Mark gaps as resolved
- Reevaluation - Test improvements with benchmarks
Interaction Monitoring
Track knowledge base effectiveness:
- User question logs
- Search performance metrics
- User feedback (helpful/not helpful reactions)
- Discord reaction tracking
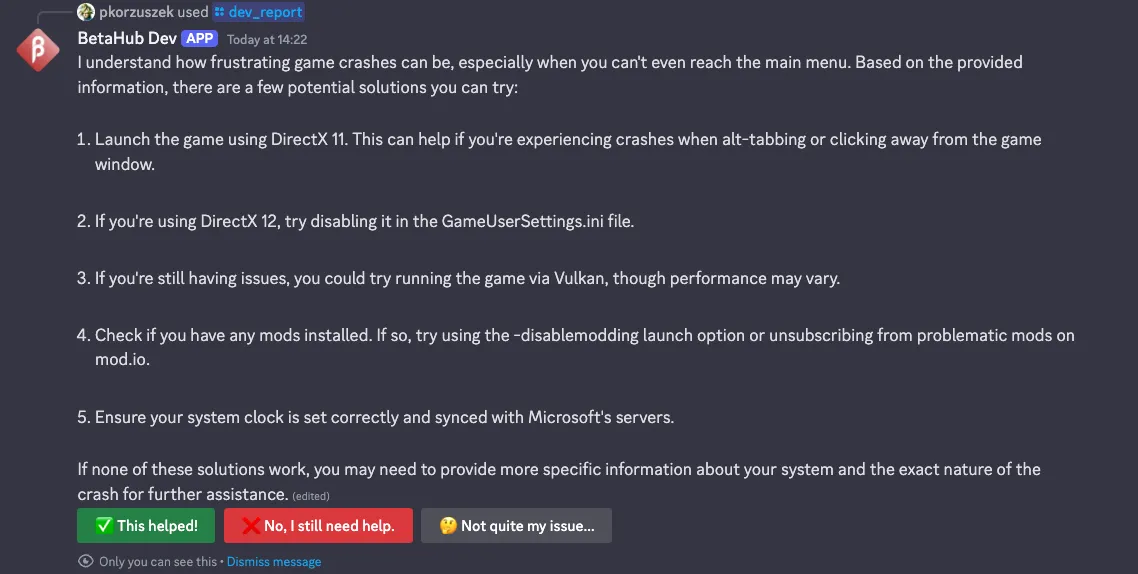
Discord Integration
The Support Knowledge Base seamlessly integrates with your Discord bot to provide instant answers directly in Discord.
Requirements:
- Discord Bot installed (Setup guide)
- Support Knowledge Base enabled (Settings / General)
- Knowledge base content uploaded
Four Ways Users Get Support in Discord:
-
/askCommand - Opens modal dialog for structured questions (30-500 characters) - Bot Mentions - Users @mention bot anywhere with their question (minimum 30 characters)
-
Instant Help Button - Admins post clickable buttons using
/post_instant_help_button - **Ask Knowledge Base** (context menu) - Moderators right-click a user’s message to look up a knowledge base answer and post it as a reply
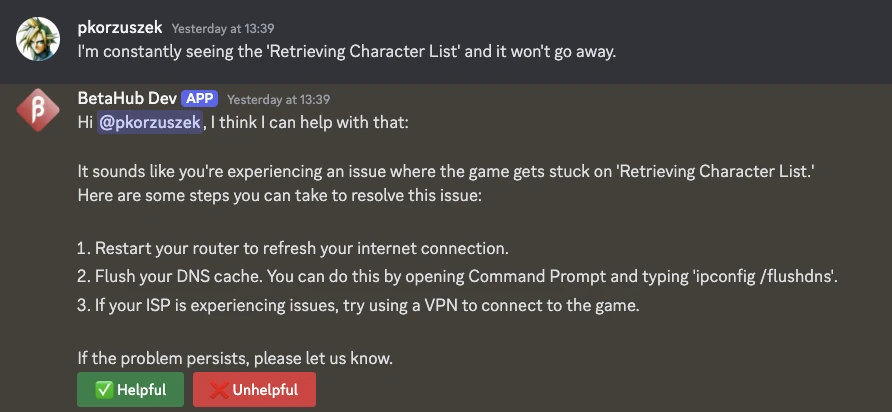
Automatic Features:
- Responds to every bug/ticket submission with relevant solutions
- Suggests fixes before formal reporting
- Integrates with Listen Mode for conversation support (automatically detects and responds to support requests in conversations)
- Feedback collection via ✅/❌ buttons in Discord
- Rate limiting prevents spam and manages costs
Customization:
- All messages customizable via Discord bot templates
- Canned responses work seamlessly in Discord
- Footer messages appear in all Discord responses
- Category-based responses ensure relevant answers (Technical vs Gameplay)
View complete Discord AI support setup and configuration →
V2 Agentic Search Engine
BetaHub offers two search engine options for the Support Knowledge Base:
| Engine | How it works | Best for |
|---|---|---|
| V1 — Embedding Search | Chunks your documents, creates vector embeddings, and matches by similarity | Simple Q&A, small knowledge bases |
| V2 — Agentic Search | An AI agent actively searches, reads, and synthesizes answers from your full documents | Complex questions, large documentation sites |
The V2 engine uses an AI agent that decides which documents to search, what sections to read, and when it has enough information to answer. This produces more accurate, comprehensive responses — especially for questions that require combining information from multiple sources.
Switching Engines:
- Go to Knowledge Base → Settings
- Under Search Engine, select V2 — Agentic Search
- Click Save Settings
Switching engines does not affect your V1 knowledge sources. Both engines can coexist — V1 sources remain available if you switch back.
V2 Document Management
V2 documents store content as full text with no chunking or embedding required. Navigate to Knowledge Base → V2 Documents to manage your documents.
Three Ways to Add Documents:
- Upload a file — PDF, TXT, or Markdown files (max 10 MB)
- Enter text directly — Provide a title, type or paste content, and optionally add a reference URL
- Import from URL — Provide a web page URL and BetaHub fetches and stores the content automatically
Document Limits by Plan:
| Plan | V2 Document Limit |
|---|---|
| Free | 50 documents |
| Standard | 200 documents |
| Pro | 500 documents |
Web Spiders
Web spiders automatically crawl documentation sites and keep your knowledge base in sync. Instead of manually importing pages one by one, point a spider at your docs site and it discovers all pages for you.
Creating a Spider:
- Go to Knowledge Base → Web Spiders
- Click New Spider
- Enter the Root URL — the starting page to crawl (e.g.,
https://docs.yourgame.com/) - Set the URL Prefix — only pages under this prefix are included (defaults to root URL)
- Optionally add Blocked Patterns — URL patterns to skip (e.g.,
/changelog,/api/) - Choose whether to Auto-enable newly discovered pages
- Click Create Spider & Start Crawl
Managing Discovered Pages:
After crawling, the spider shows all discovered pages with checkboxes. You can:
- Enable/disable individual pages — disabled pages are excluded from the knowledge base
- View status — Fetched, Pending (waiting for document limit capacity), Refreshing, Failed (page could not be fetched), or Removed (page no longer found at URL)
- Click Crawl Now to re-fetch all pages with fresh content
Automatic Re-crawling Support Knowledge Base:
On Standard and Pro plans, you can set an automatic re-crawl interval (every 8, 12, 24, or 48 hours, or weekly) to keep your documentation in sync. Free plan users can re-crawl manually at any time using the Crawl Now button.
Response Style
Control how the AI formats and phrases its answers. Go to Knowledge Base → Settings and find the Response Style section.
Preset Options:
- Response Length: Concise (~300 chars), Standard (~1000 chars), or Detailed (~1800 chars)
- Response Tone: Formal, Friendly, or Casual
Custom Style Instructions:
Check “Use custom style instructions instead” to write free-form instructions that override the presets. Examples:
- “Be very casual and use gaming slang. Keep it brief.”
- “Respond as if you’re a friendly NPC guide in the game”
When using presets, responses automatically use Discord-compatible formatting (bold, italic, code blocks, lists). If you use custom style instructions, consider including formatting guidance in your instructions.
Source Links
When enabled, the AI includes links to the specific documentation sections it referenced in its answer. Links point directly to the relevant heading on the source page (e.g., https://docs.yourgame.com/setup#installation).
Source links are enabled by default. To change this setting:
- Go to Knowledge Base → Settings
- Toggle Include source links in responses
- Click Save Settings
Source links only appear for web page documents that have a URL — uploaded files without a URL are never linked.
V2 API Testing Console
Test the V2 agentic search engine directly from the dashboard without needing the Discord bot.
- Go to Knowledge Base → API Testing
- Enter a question in the text area
- Click Ask Agent
The console displays:
- Answer — The AI’s response with a “Answer found” or “No answer” badge
- Agent Decision Flow — A numbered list of every tool the agent called (search, grep, read_document), showing what it searched for and which documents it read
- Documents Accessed — Links to the source documents the agent used
This is useful for testing whether your knowledge base answers questions correctly before going live with the Discord bot.
Sentiment Analysis
Monitor your Discord community’s mood with AI-powered sentiment analysis.
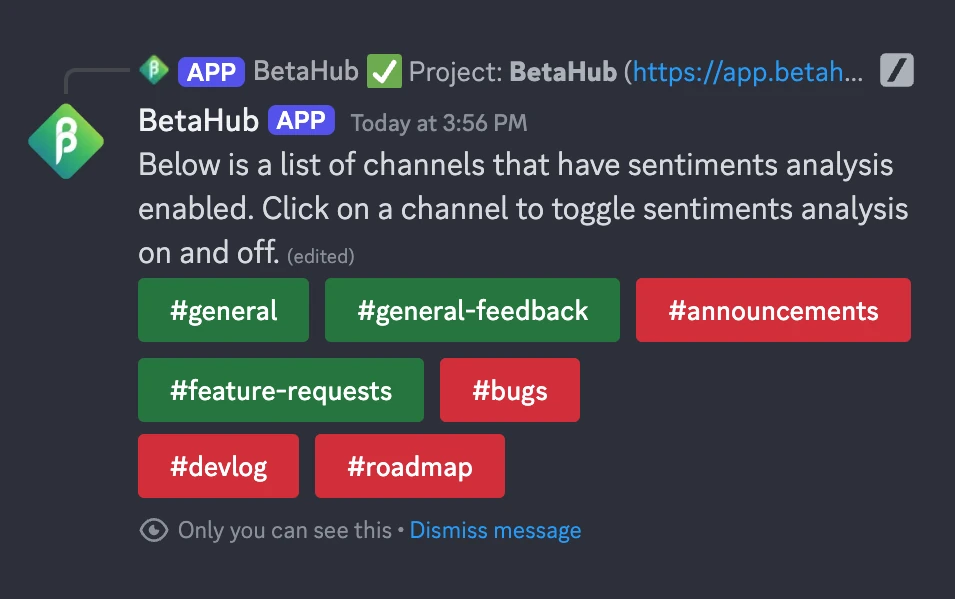
Enabling Sentiment Analysis
- Invite BetaHub Discord Bot
- Use
/infocommand - Click Configure Sentiments Channels
- Select channels to monitor
Sentiment Dashboard
Access comprehensive mood analytics via Sentiments menu:
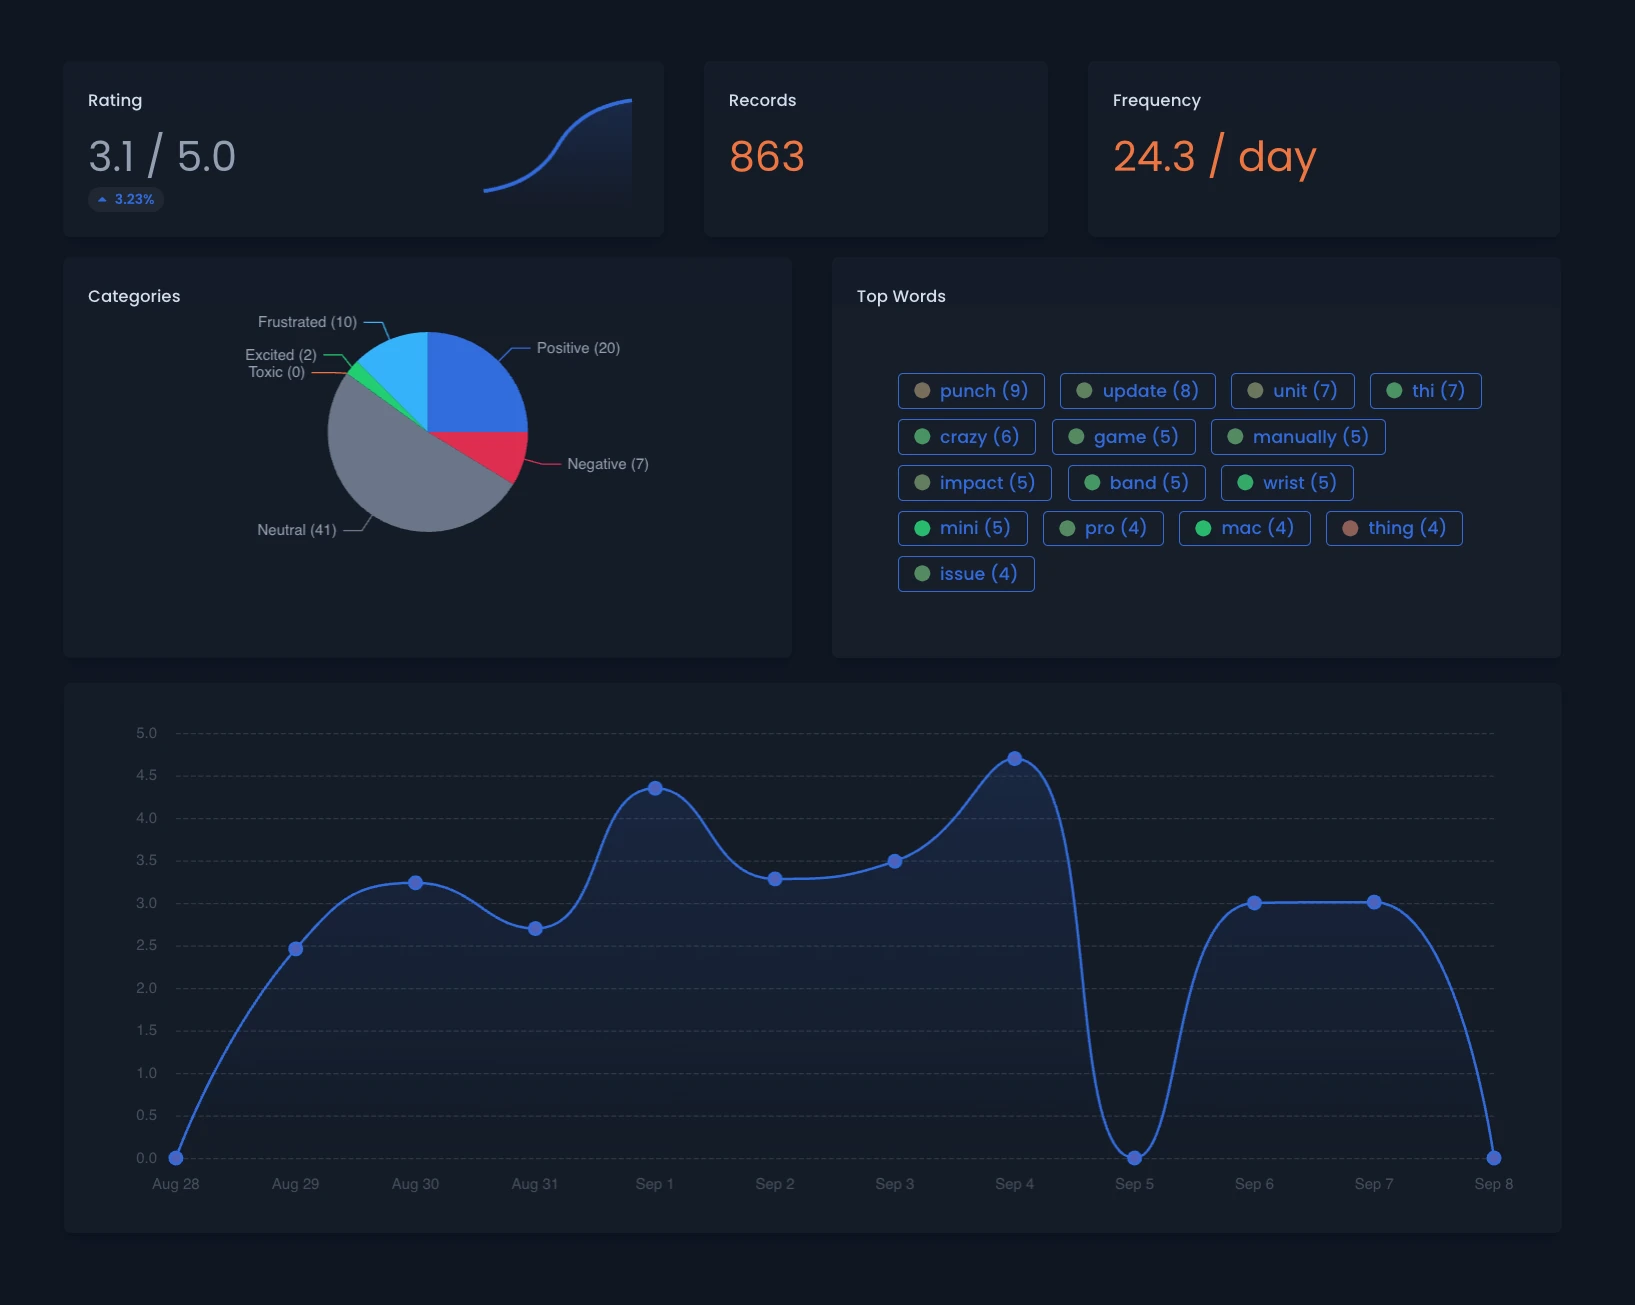
Key Metrics:
- Rating - 1-5 sentiment score (higher = more positive)
- Records - Number of analyzed messages
- Frequency - Reports per day
- Categories - Excited, Positive, Neutral, Negative, Frustrated, Toxic
- Top Words - Most frequent terms with sentiment color-coding
- Trend Chart - Historical sentiment progression
- Discussion Topics - AI-organized conversation themes with individual insights (learn more)
Advanced Filtering
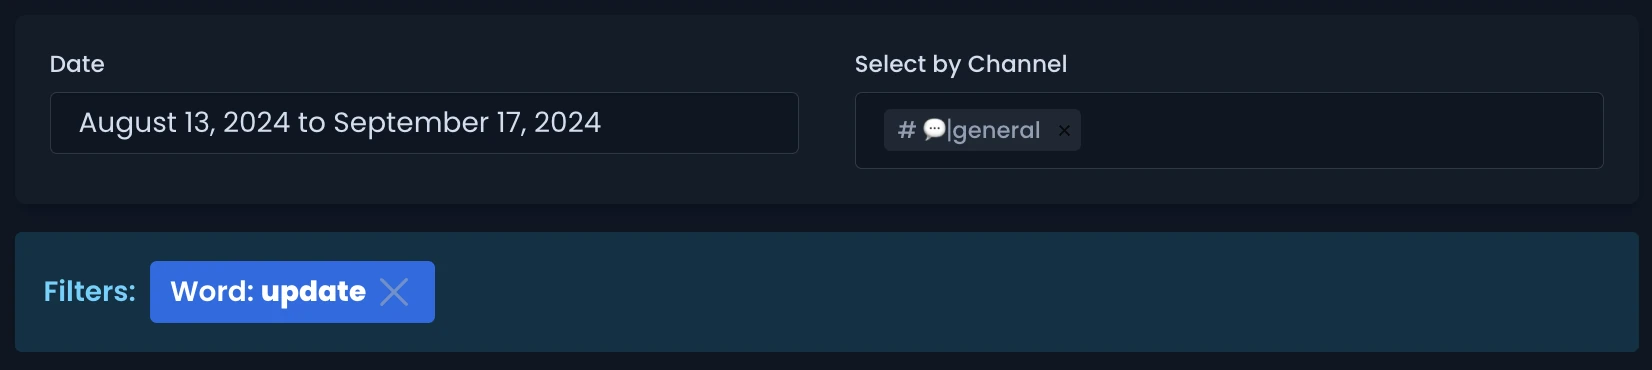
Filter sentiment data by:
- Date Range - Specific time periods
- Channels - Individual or multiple channels
- Words - Click top words to filter by term
- Categories - Click category bars to filter by sentiment
Troubleshooting Sentiment Analysis
Bot Not Responding:
- Verify bot permissions for slash commands
- Ensure setup completion
No Results Showing:
- Check channel configuration via
/info - Wait 5-10 minutes for dashboard refresh
- Verify bot can see configured channels
Organizing Discussion Topics
Sentiment Topics help you organize community feedback by automatically categorizing Discord conversations into themes like “bugs”, “gameplay”, “matchmaking”, or “UI/UX”. Instead of viewing all sentiment as one stream, topics let you track trends and insights for each discussion area separately.
How It Works:
When analyzing Discord messages, BetaHub’s AI automatically assigns each message to a topic based on its content. Topics then appear in your sentiment dashboard with individual trend charts, average ratings, and AI-generated insights showing what players are discussing in each area.
Two Organization Modes:
BetaHub offers two approaches for managing topics:
Auto-Generate (Default) - The AI creates topics automatically as new discussion themes emerge in your community. This organic approach is ideal when you want to discover what players naturally talk about without predefined categories.
Manual Topics - You define specific topics upfront, and the AI assigns messages only to your predefined list. This controlled approach works best when you know your key discussion areas and want consistent, structured analytics.
Setting Up Manual Topics:
- Navigate to Settings → Sentiments in your project
- Disable “Enable automatic topic generation” to switch to manual mode
- Click “Add Topic” to create each topic:
- Title (required) - Keep it short and clear (e.g., “weapon customization”, “bugs”, “performance”)
- Description (optional) - Help the AI understand what this topic covers (e.g., “Feedback about customizing weapons and loadouts”)
- Click “Save Changes”
The AI will now categorize messages using only your defined topics. When a message doesn’t fit any topic well, it falls back to the first topic in your list.
Viewing Topic Insights:
In your Sentiment dashboard, the Discussion Topics Analysis section displays each topic with:
- Mention count showing how often players discuss this topic
- Trend chart visualizing sentiment changes over time
- Average rating with percentage change from previous period
- AI-generated insights highlighting key discussion points
You can click any topic to drill down into specific messages and detailed analytics.
Best Practices:
- Keep it focused - Start with 5-10 topics that matter most to your game
- Use clear titles - Choose names players would naturally use (“lag” not “network latency”)
- Add descriptions - Help the AI understand nuances, especially for game-specific terms
- Include “Other” - When using manual mode, add an “Other” topic as a catch-all for unrelated discussions
- Review regularly - Check insights weekly to see if your topics match actual discussion patterns
When to Use Each Mode:
Choose Manual Topics when you want structured reporting, need consistency across time periods, or already know your key discussion areas from community experience.
Choose Auto-Generate when launching new features, exploring community sentiment for the first time, or want to discover organic discussion themes without bias.
You can switch between modes anytime without losing data - existing topic assignments remain unchanged.
Game Facts
Enhance AI understanding with detailed game context for more accurate bug processing.
Benefits
Game Facts improve AI performance by providing:
- Game context - Genre, mechanics, features
- Priority rules - Critical vs. non-critical systems
- Terminology - Game-specific vocabulary
- Importance hierarchy - Feature priority understanding
Enhanced AI Capabilities
With Game Facts configured, AI can:
- Generate more precise bug titles
- Assign appropriate tags based on game systems
- Better understand game-specific terminology
- Apply game-appropriate priority rules
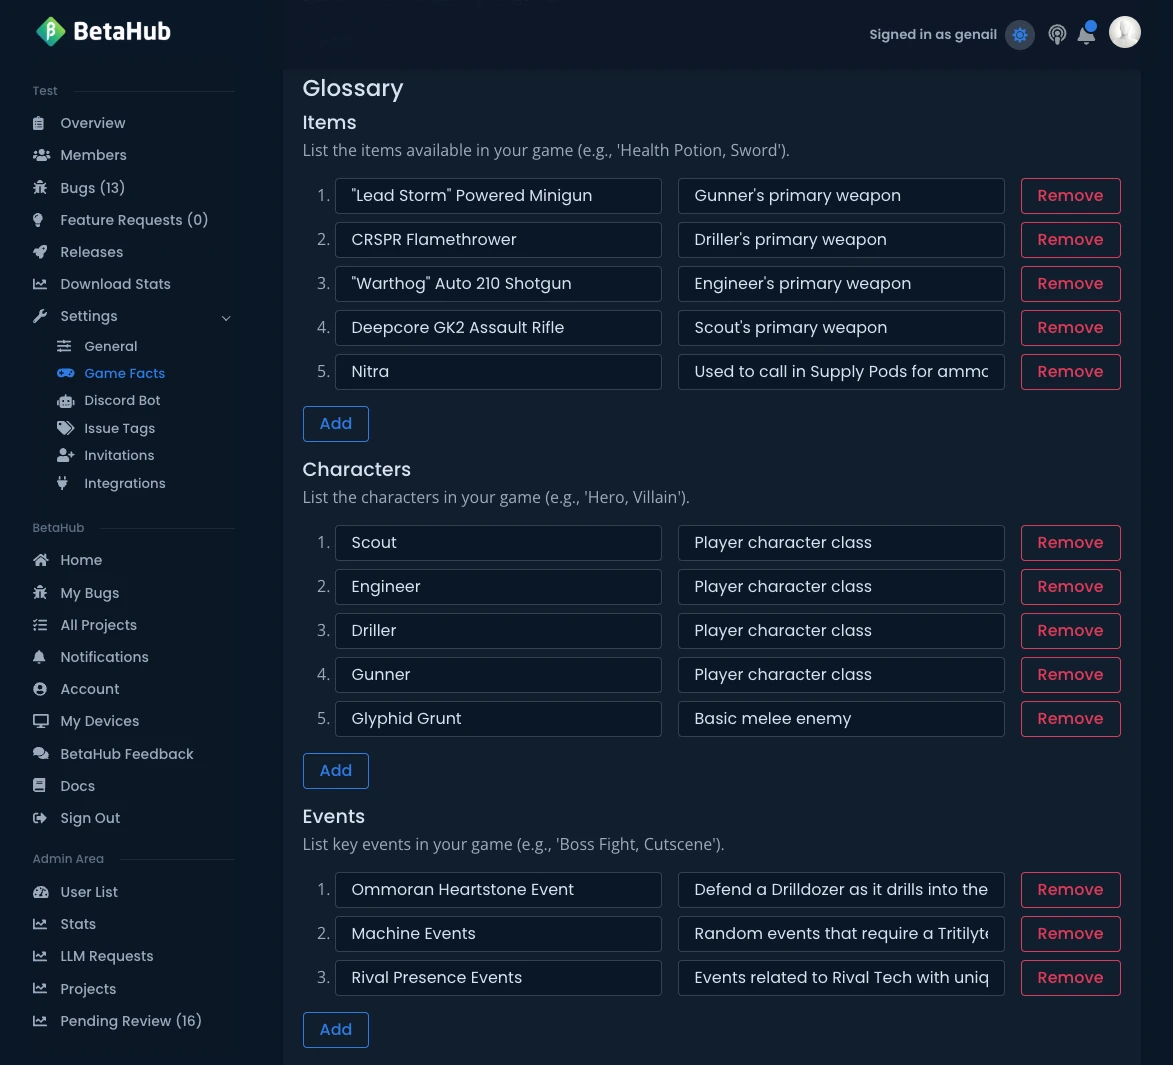
Setup Options
Manual Configuration:
- Fill out comprehensive game information form
- Define critical systems and features
- Create terminology glossary
AI-Assisted Setup:
- Click Upload the Document
- Paste game documentation or description
- Click Extract Information
- Review and edit extracted details
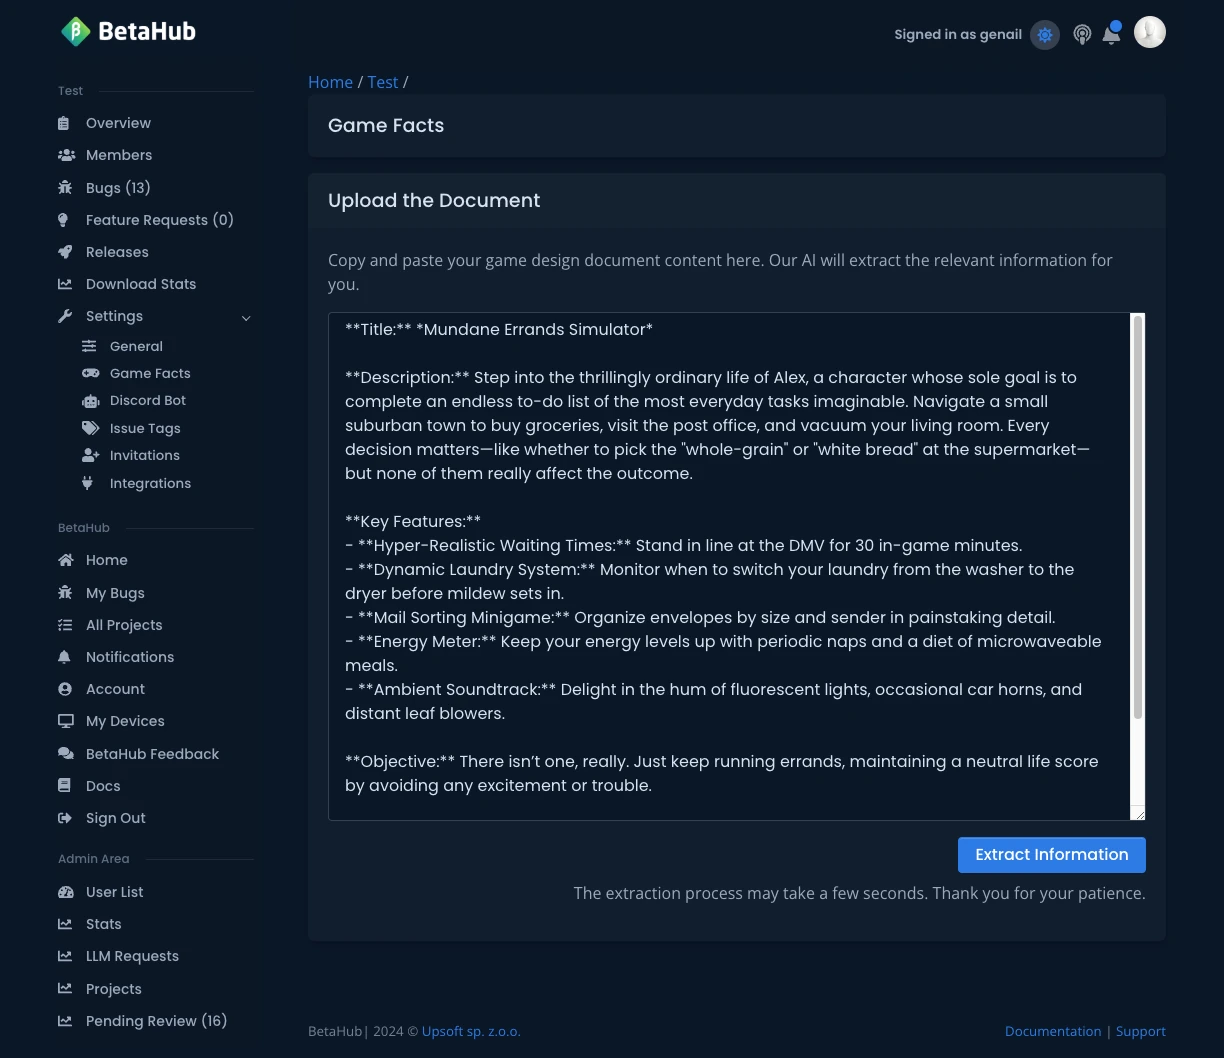
The AI analyzes your text and pre-fills the form with relevant game information.
Activity Feed
Keep track of what’s happening in your project with a simple activity feed that logs important actions and changes.
What is the Activity Feed?
The Activity Feed is a chronological log of actions taken within your project. It automatically records when team members create issues, make comments, change statuses, or perform other important project activities. This provides a basic audit trail to help teams stay informed about project progress.
What Gets Tracked
The system automatically logs activities for:
Issues and Bugs:
- Issue creation
- Status changes (Open → In Progress → Resolved → Closed)
- Assignment changes
- Comments on issues
- Requests for additional details (screenshots, video clips, log files, device info, steps to reproduce)
Feature Requests (Suggestions):
- Feature request creation
- Status changes
- Comments on feature requests
- Feature request splitting
Support Tickets:
- Ticket creation
- Assignment changes
- Status updates
- Comments on tickets
Releases:
- Release creation
Media Files:
- Screenshot uploads and comments
- Video clip uploads and comments
- Log file uploads and comments
Attachments:
- File attachments added to issues, tickets, or feature requests
Notifications:
- Email notifications sent
- Discord notifications sent
Automation:
- Release follow-up notifications sent
- Release feedback responses received
Who Can See Activities
Activity feeds are restricted to authorized team members:
- Project developers can view all project activities
- Support staff can view project activities
- Project administrators have full access
- Regular testers cannot view activity feeds
Using the Activity Feed
The activity feed appears in different contexts throughout BetaHub:
Project-Wide Activities:
- View all activities across your entire project
- See what all team members have been working on
- Basic chronological listing of recent actions
Issue-Specific Activities:
- View activities related to a particular issue
- See the history of comments, status changes, and assignments
- Track the lifecycle of individual bug reports
Contextual Activity Views:
- Activity feeds automatically show relevant activities based on current page
- Issues page shows issue-related activities
- Tickets page shows ticket-related activities
- Feature requests page shows suggestion-related activities
- Load more activities with simple pagination
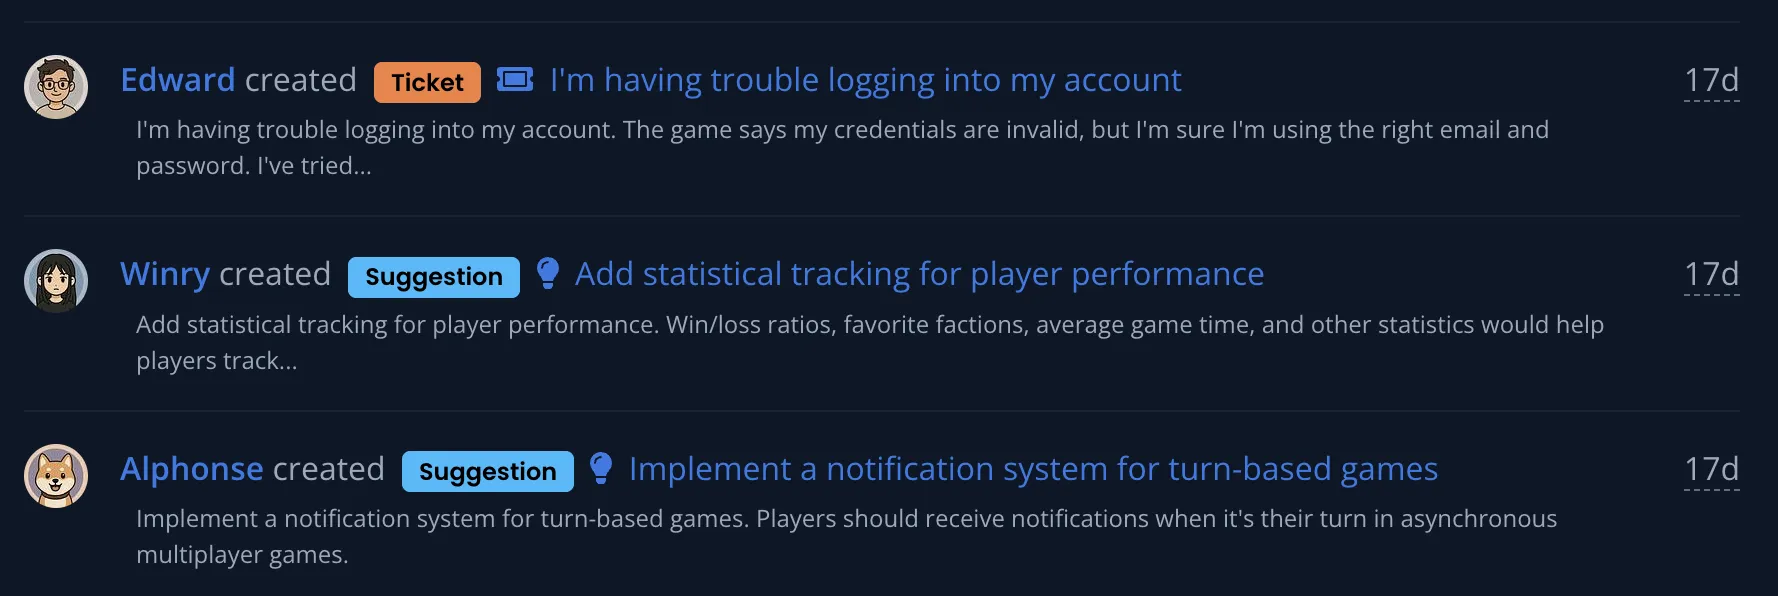
Activity Display
Each activity shows:
- Who performed the action (with user avatar when available)
- What they did (created, assigned, commented, etc.)
- When it happened (relative timestamps)
- Entity type (Bug, Ticket, Suggestion, Release, etc.)
- Link to view details of the related item
Activities include content snippets when relevant, such as:
- Brief excerpts from issue descriptions
- Comment previews
- Release descriptions
System Activities
Some activities are performed by automated systems:
- Discord Bot activities when bugs are reported via Discord
- Game Form activities from in-game bug reporting
- System activities for automated processes
These are clearly marked with appropriate icons and labels.
Getting Started
Activity feeds are automatically enabled - no setup required. To use them effectively:
- Check Recent Activity - Visit your project to see what’s been happening
- Review Issue History - Look at activity feeds on individual issues to understand their progression
- Stay Informed - Use activity feeds to keep up with team member contributions
- Navigate by Context - Visit different project sections (Issues, Tickets, Suggestions) to see focused activity feeds
The activity feed provides a simple way to maintain visibility into your project’s progress without complex dashboards or analytics.
Automation Rules
Automation Rules let you set up automatic actions that fire when new bugs are submitted. Rules can send follow-up messages when required information is missing, or automatically assign devices based on who reported the bug. Define rules once and let BetaHub handle the rest.
Common use cases:
- A tester reports a crash via Discord without uploading logs. BetaHub waits 60 seconds, then sends a friendly message asking for log files — all without developer intervention.
- A member of your “PS5 Testers” Discord role submits a bug. BetaHub automatically assigns “PlayStation 5” as the device on the report, saving the tester from filling it in manually.
Requirements:
- Automation Tasks experimental feature enabled (Settings → General → Experimental Features)
- Discord Bot connected (for Discord message delivery and role-based conditions)
How It Works
- A bug is submitted — either via Discord or the web interface
- A matching rule triggers — based on the trigger type (e.g., new issue, optionally filtered by tags)
- The system waits for the configured delay (e.g., 60 seconds), giving the reporter time to upload attachments on their own
- The condition is checked — for example, is a required attachment missing? Does the reporter have a specific Discord role?
- If the condition is met, BetaHub performs the configured action — sending a follow-up message, assigning a device, etc.
Setting Up Automation Rules
- Navigate to Settings → Automations in your project sidebar
- Click Manage Automation Rules
- Click New Rule
- Configure the rule (see sections below)
- Click Create Rule
Rule Configuration
Each rule has four sections:
General:
- Name — A descriptive name for the rule (e.g., “Ask for logs on crash”)
- Enabled — Toggle the rule on or off without deleting it
Trigger:
- Trigger Type — “Issue created” (fires whenever a new bug is submitted)
- Tags (optional) — Narrow the trigger to issues with specific tags. If no tags are selected, the rule fires for all new issues. Hold Ctrl/Cmd to select multiple
- Run on duplicate issues — When checked, the rule also fires for bugs that are auto-classified as duplicates. This is enabled by default. Uncheck to skip duplicate issues
Condition:
Choose what to check before running the action:
| Condition | What it checks | Additional settings |
|---|---|---|
| No attachment | Whether the issue is missing a specific attachment type | Select attachment type: Logs, Screenshot, or Video |
| Reporter has Discord role | Whether the reporter has one of the selected Discord roles | Select one or more Discord roles (see Discord Role Conditions below) |
Action:
Choose what happens when the condition is met:
| Action | What it does | Additional settings |
|---|---|---|
| Ask user for details | Sends a follow-up message to the reporter via Discord | Select one or more fields to request (see Field Options below) and write a message template (see Message Templates) |
| Assign device | Automatically sets the device on the issue | Select device type and configuration (see Device Assignment below) |
Delay:
- Delay (seconds) — How long to wait before checking the condition (0–86,400 seconds). This gives reporters time to upload attachments before receiving a follow-up. A typical value is 60 seconds.
Message Templates
Write your follow-up messages using template variables that get replaced with actual issue data. Use triple curly braces around variable names:
Hi! Your bug "{{{title}}}" appears to be a crash.
Could you please upload your log files so we can investigate?
Available variables:
| Variable | Description |
|---|---|
{{{title}}} |
Bug report title |
{{{description}}} |
Full bug description |
{{{priority}}} |
Assigned priority level |
{{{status}}} |
Current issue status |
{{{tag_names}}} |
Comma-separated list of assigned tags |
{{{issue_url}}} |
Direct link to the bug report |
{{{version}}} |
Release/version label |
{{{created_at}}} |
Submission date and time |
{{{heat}}} |
Heat score |
{{{steps_to_reproduce}}} |
Steps to reproduce (if provided) |
{{{device}}} |
Device information (if provided) |
{{{discord_message}}} |
Original Discord message text |
{{{due_date}}} |
Due date (if set) |
Custom fields are also available as {{{custom_field_<ident>}}}, where <ident> is the field’s identifier from your custom fields configuration.
Field Options
When using the “Ask user for details” action, you can select one or more fields the reporter should be asked for. A single rule can request multiple pieces of information in one follow-up — for example, asking for both log files and a screenshot in the same message.
Built-in fields:
| Field | What the reporter provides |
|---|---|
| Logs | Log files (text file attachments) |
| Screenshot | Screenshot images |
| Video | Video recordings |
| Steps to Reproduce | Written steps to reproduce the bug |
| Device | Device information (parsed automatically) |
Custom fields:
If your project has custom fields configured for issues, they also appear in the field list. For select-type custom fields (single select, multi select), BetaHub passes the available options to the Discord bot so reporters can choose from a list instead of typing free text.
Discord select menus support a maximum of 25 options. If a custom field has more than 25 options, a warning is shown in the form and only the first 25 options are displayed to the reporter.
Per-field settings:
Each selected field has two optional checkboxes that appear when the field is checked:
| Setting | What it does |
|---|---|
| Optional | Marks the field as not required. The reporter can skip it without providing a response. By default, all fields are required. |
| Only if not provided | Skips asking for this field if the issue already has data for it. For example, if the reporter already uploaded a screenshot with their bug report, they won’t be asked for one again. |
“Only if not provided” is especially useful when requesting multiple fields — you can configure a rule to always ask for logs, screenshots, and steps, but only for the ones the reporter hasn’t already included. If all fields are already present, the rule won’t send a follow-up at all.
Discord Role Conditions
The “Reporter has Discord role” condition lets you run automation actions only for reporters who have specific roles in your Discord server. This is useful when different groups of testers use different hardware — for example, your “PS5 Testers” role members should have their bugs automatically tagged with the PlayStation 5 device.
How it works:
- When a bug is submitted through the Discord bot, BetaHub captures the reporter’s Discord roles
- The automation rule checks the reporter’s roles against the roles you selected in the condition
- If the reporter has any of the selected roles, the action runs
Syncing Discord roles:
Before you can use this condition, your Discord server’s roles need to be synced to BetaHub:
- Open the automation rule form and select “Reporter has Discord role” as the condition
- Click the Refresh button — this fetches all roles from your Discord server
- Once synced, roles appear in the multi-select dropdown
- Select one or more roles. Hold Ctrl/Cmd to select multiple
The Discord bot must be connected and running for role syncing to work. Roles are fetched on demand — click Refresh whenever you add new roles to your Discord server.
Device Assignment
The “Assign device” action automatically sets the device information on a bug report. This saves reporters from manually selecting their device and ensures consistent device data across reports.
Supported device types:
| Device type | Configuration |
|---|---|
| Console | Select from: PlayStation 5 Pro, PlayStation 5, PlayStation 4 Pro, PlayStation 4, Xbox Series X, Xbox Series S, Xbox One X, Nintendo Switch, Nintendo Switch 2, and more |
| Virtual Headset | Select from: Oculus Quest 3, Oculus Quest 2, HTC Vive Pro 2, PlayStation VR, PlayStation VR 2, Valve Index, and more |
| PC | Select operating system: Windows 11, Windows 10, Ubuntu Linux, Fedora Linux, and more |
| Mobile | Select operating system: Android (versions 6–16) or iOS (versions 10–18) |
| Mac | Enter the model name (free text, e.g., “MacBook Pro 16-inch”) |
| Other | Enter the device name (free text, e.g., “Steam Deck”) |
If the issue already has a device assigned, the automation will skip the assignment to avoid overwriting existing data.
Example Rules
Example 1: Ask for logs and screenshot on crash
Scenario: You want to automatically ask reporters for missing log files and a screenshot whenever a crash-related bug is submitted. Logs are required, the screenshot is optional, and neither should be asked for if the reporter already included them.
| Setting | Value |
|---|---|
| Name | Ask for crash details |
| Enabled | Yes |
| Trigger Type | Issue created |
| Tags | Performance - Crash |
| Delay | 60 seconds |
| Condition Type | No attachment |
| Attachment Type | Logs |
| Action Type | Ask user for details |
| Fields to request | Logs (Only if not provided), Screenshot (Optional, Only if not provided) |
| Message | Hi! Your bug “{{{title}}}” looks like a crash. Could you please provide the following so we can investigate? |
When a bug is submitted and tagged as “Performance - Crash” by the AI:
- BetaHub waits 60 seconds
- Checks if the reporter has uploaded any log files (the condition)
- If no logs are found, checks which requested fields are still missing
- Sends a single follow-up message asking for the missing fields — for example, if the reporter already uploaded a screenshot but not logs, only logs are requested
- The reporter can reply in Discord with the requested files
Example 2: Auto-assign PS5 for PlayStation testers
Scenario: Your Discord server has a “PS5 Testers” role for community members who test on PlayStation 5. You want bugs from these testers to automatically have the correct device assigned.
| Setting | Value |
|---|---|
| Name | Assign PS5 to PlayStation testers |
| Enabled | Yes |
| Trigger Type | Issue created |
| Tags | (leave empty — applies to all issues) |
| Delay | 0 seconds |
| Condition Type | Reporter has Discord role |
| Discord Roles | PS5 Testers |
| Action Type | Assign device |
| Device Type | Console |
| Console | PlayStation 5 |
When a member with the “PS5 Testers” Discord role submits a bug:
- BetaHub checks the reporter’s Discord roles
- Finds a match with the “PS5 Testers” role
- Assigns “Console — PlayStation 5” as the device on the bug report
You can create similar rules for other platform-specific roles (e.g., “Xbox Testers” → Xbox Series X, “VR Testers” → Oculus Quest 3).
Who Can Manage Rules
- Project developers can create, edit, and delete automation rules
- Organization administrators have full access
- Testers and support staff cannot see or manage automation rules
Tips
- Start with longer delays (60–120 seconds) for “Ask user” rules — give reporters a chance to upload files before bothering them
- Use 0 delay for device assignment — there’s no reason to wait when auto-assigning devices
- Keep messages friendly — reporters are more likely to respond to a conversational message than a formal request
- Use specific tags — avoid triggering on broad parent tags; target specific sub-tags like “Performance - Crash” rather than “Performance”
- Test with short delays — when setting up a new rule, use a 5-second delay to verify it works, then increase to your preferred delay
- Use “Only if not provided” — when requesting multiple fields, enable this for each field to avoid asking for information the reporter already included
- One rule per scenario — avoid creating overlapping rules that could send multiple messages for the same issue
- Create one device rule per role — set up separate rules for each Discord role/device combination (e.g., one for PS5 Testers, one for Xbox Testers)
- Combine fields in one rule — instead of creating separate rules for logs, screenshots, and steps, create one rule that requests all of them. Use “Only if not provided” and “Optional” to keep follow-ups relevant
Log Redaction Patterns
Protect tester privacy by automatically hiding sensitive information in uploaded log files. When testers submit bug reports with log files attached, BetaHub can redact usernames, file paths, API keys, and other personal data before developers see them.
Why Redaction Matters
Log files often contain sensitive information:
-
User paths like
C:\Users\JohnDoe\Documents\MyGame\reveal real names - API keys and tokens could be exposed accidentally
- Session data may contain authentication details
Redaction replaces this data with safe placeholders like [REDACTED:Windows User Path], keeping logs useful while protecting privacy.
Predefined Patterns
BetaHub includes built-in patterns for common sensitive data:
| Pattern | What It Matches | Example |
|---|---|---|
| Windows User Path | C:\Users\username\... |
C:\Users\JohnDoe\Documents\ |
| Mac User Path | /Users/username/... |
/Users/jane/Library/ |
| Linux Home Path | /home/username/... |
/home/player1/games/ |
| Environment Variable | %VARIABLE_NAME% |
%USERPROFILE%, %USERNAME%
|
The first three patterns are enabled by default for new projects. The Environment Variable pattern is available but not enabled by default. You can toggle any pattern in Settings → Log Redaction.
Creating Custom Patterns
For game-specific sensitive data, create custom patterns:
- Go to Settings → Log Redaction
- Click Add Custom Pattern
- Enter a Pattern Name (appears in redacted output)
- Enter the Glob Pattern to match
- Test with sample text using the live preview
- Save and enable the pattern
Glob Syntax
Patterns use glob syntax for flexible matching:
| Symbol | Matches | Example |
|---|---|---|
* |
Any characters except / and \
|
api_key=* matches api_key=abc123
|
** |
Anything including full paths |
**MyGame matches C:/Users/name/MyGame
|
? |
Any single character except / and \
|
?:/Users/** matches C:/Users/john/docs
|
Common patterns:
-
api_key=*– Redacts API keys in query strings -
Bearer *– Redacts authorization tokens -
session_id=*– Redacts session identifiers -
?:/**MyGame– Redacts full Windows paths ending in your game name
Pattern Tester
Before saving, test your pattern with sample log content:
- Enter your glob pattern
- Paste sample text in the Sample Text area
- See redacted output in the Preview panel
- The badge shows match count (green = matches found)
This helps verify your pattern works correctly before applying it to real log files.
How It Works
- Patterns apply automatically when log files are uploaded
- Only new uploads are affected (existing logs unchanged)
- Multiple patterns can be active simultaneously
- Predefined patterns can be toggled but not modified
- Custom patterns can be edited or deleted anytime
Getting Help
For assistance with advanced features:
- Join our Discord server for community support
- Check the FAQ for common questions
- Contact support for technical issues
See Also
- Core Features – Feedback management essentials
- Webhooks – Real-time event notifications
- API Access – REST API and authentication
- Managing Feedback – Workflow best practices