Features
BetaHub helps you collect and manage feedback from your game’s community.
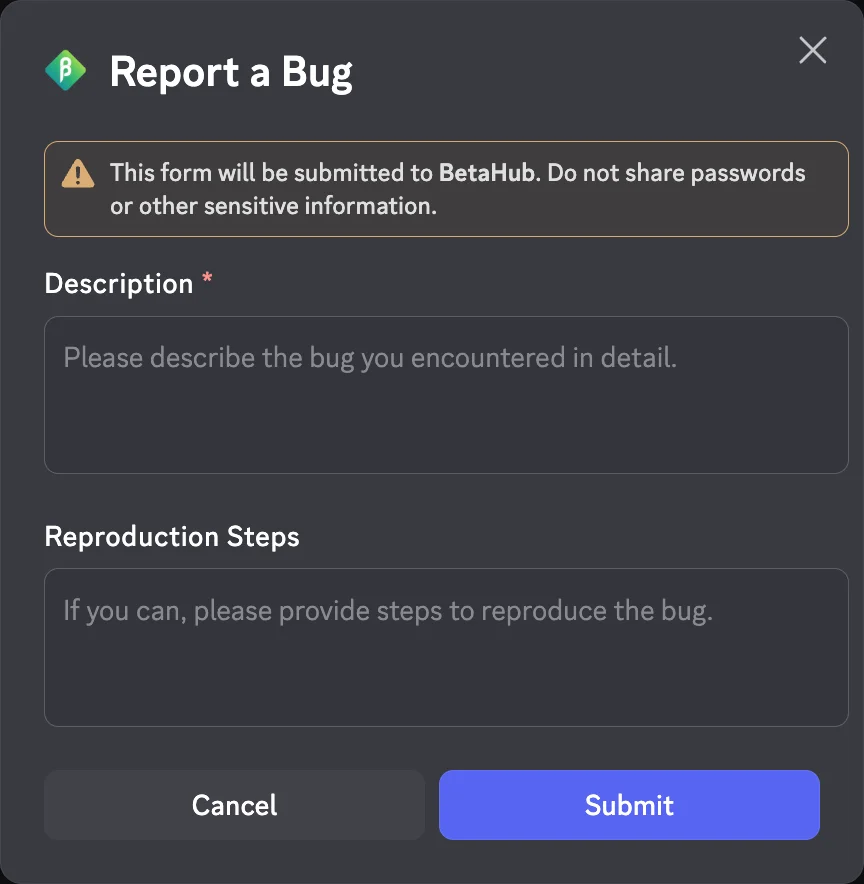
Feedback Collection
Testers can submit bugs and suggestions through:
-
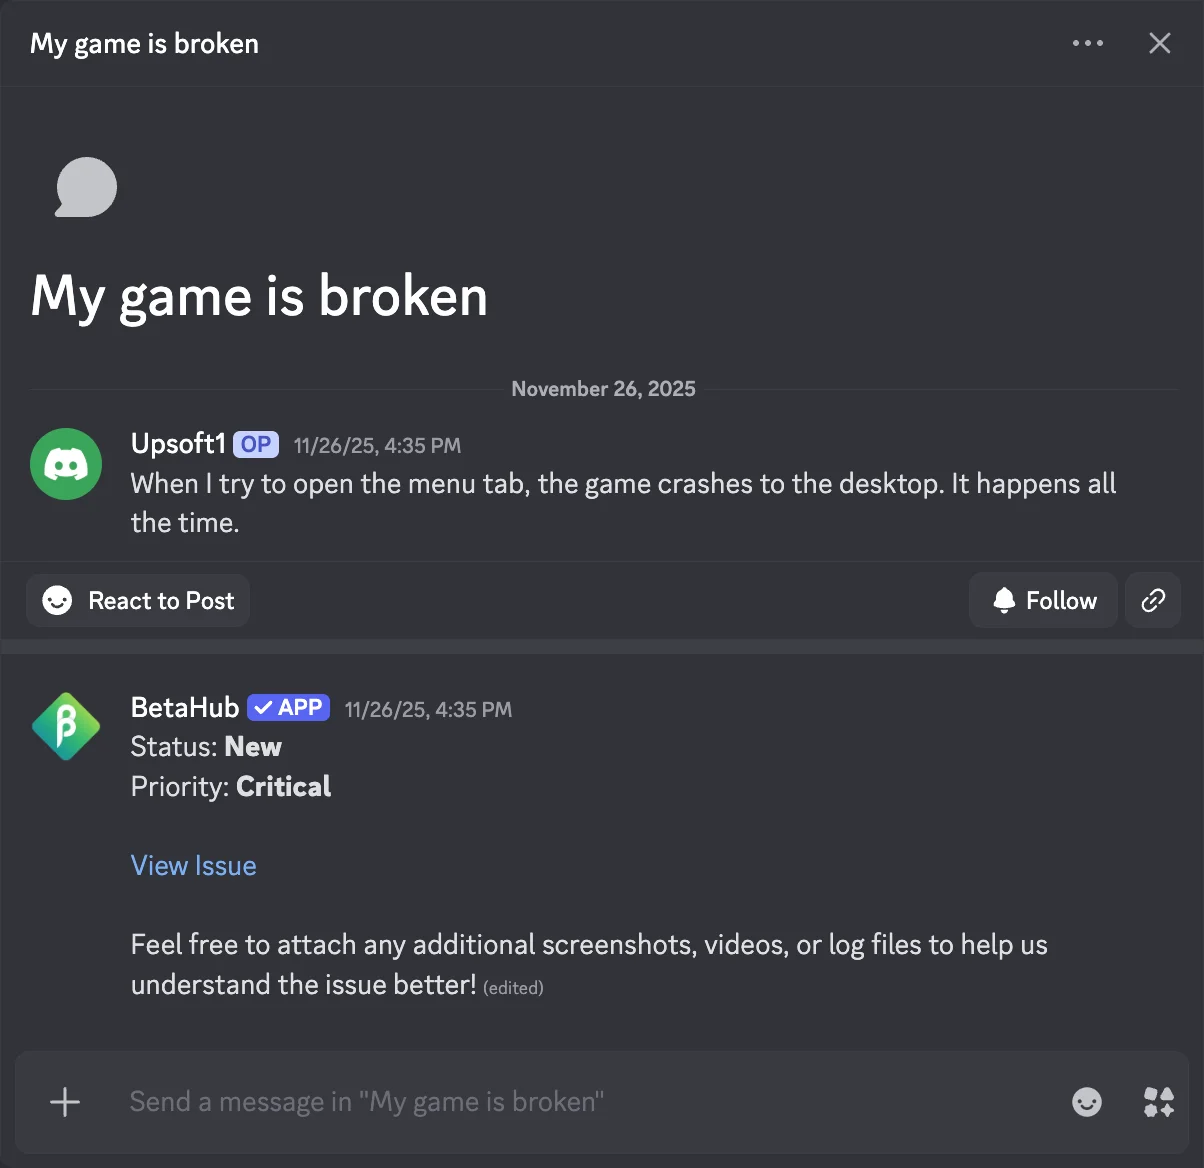
Discord –
/reportand/suggestcommands, forum channels, or automatic detection from chat - In-game – Unity and Unreal plugins with automatic screenshots and video
- Web forms – Embeddable widget or direct submission on BetaHub
All submissions are processed automatically:
- Generates clear titles from descriptions
- Assigns priority based on severity
- Detects duplicates and links related reports
- Applies tags based on your game’s systems
Feedback Management
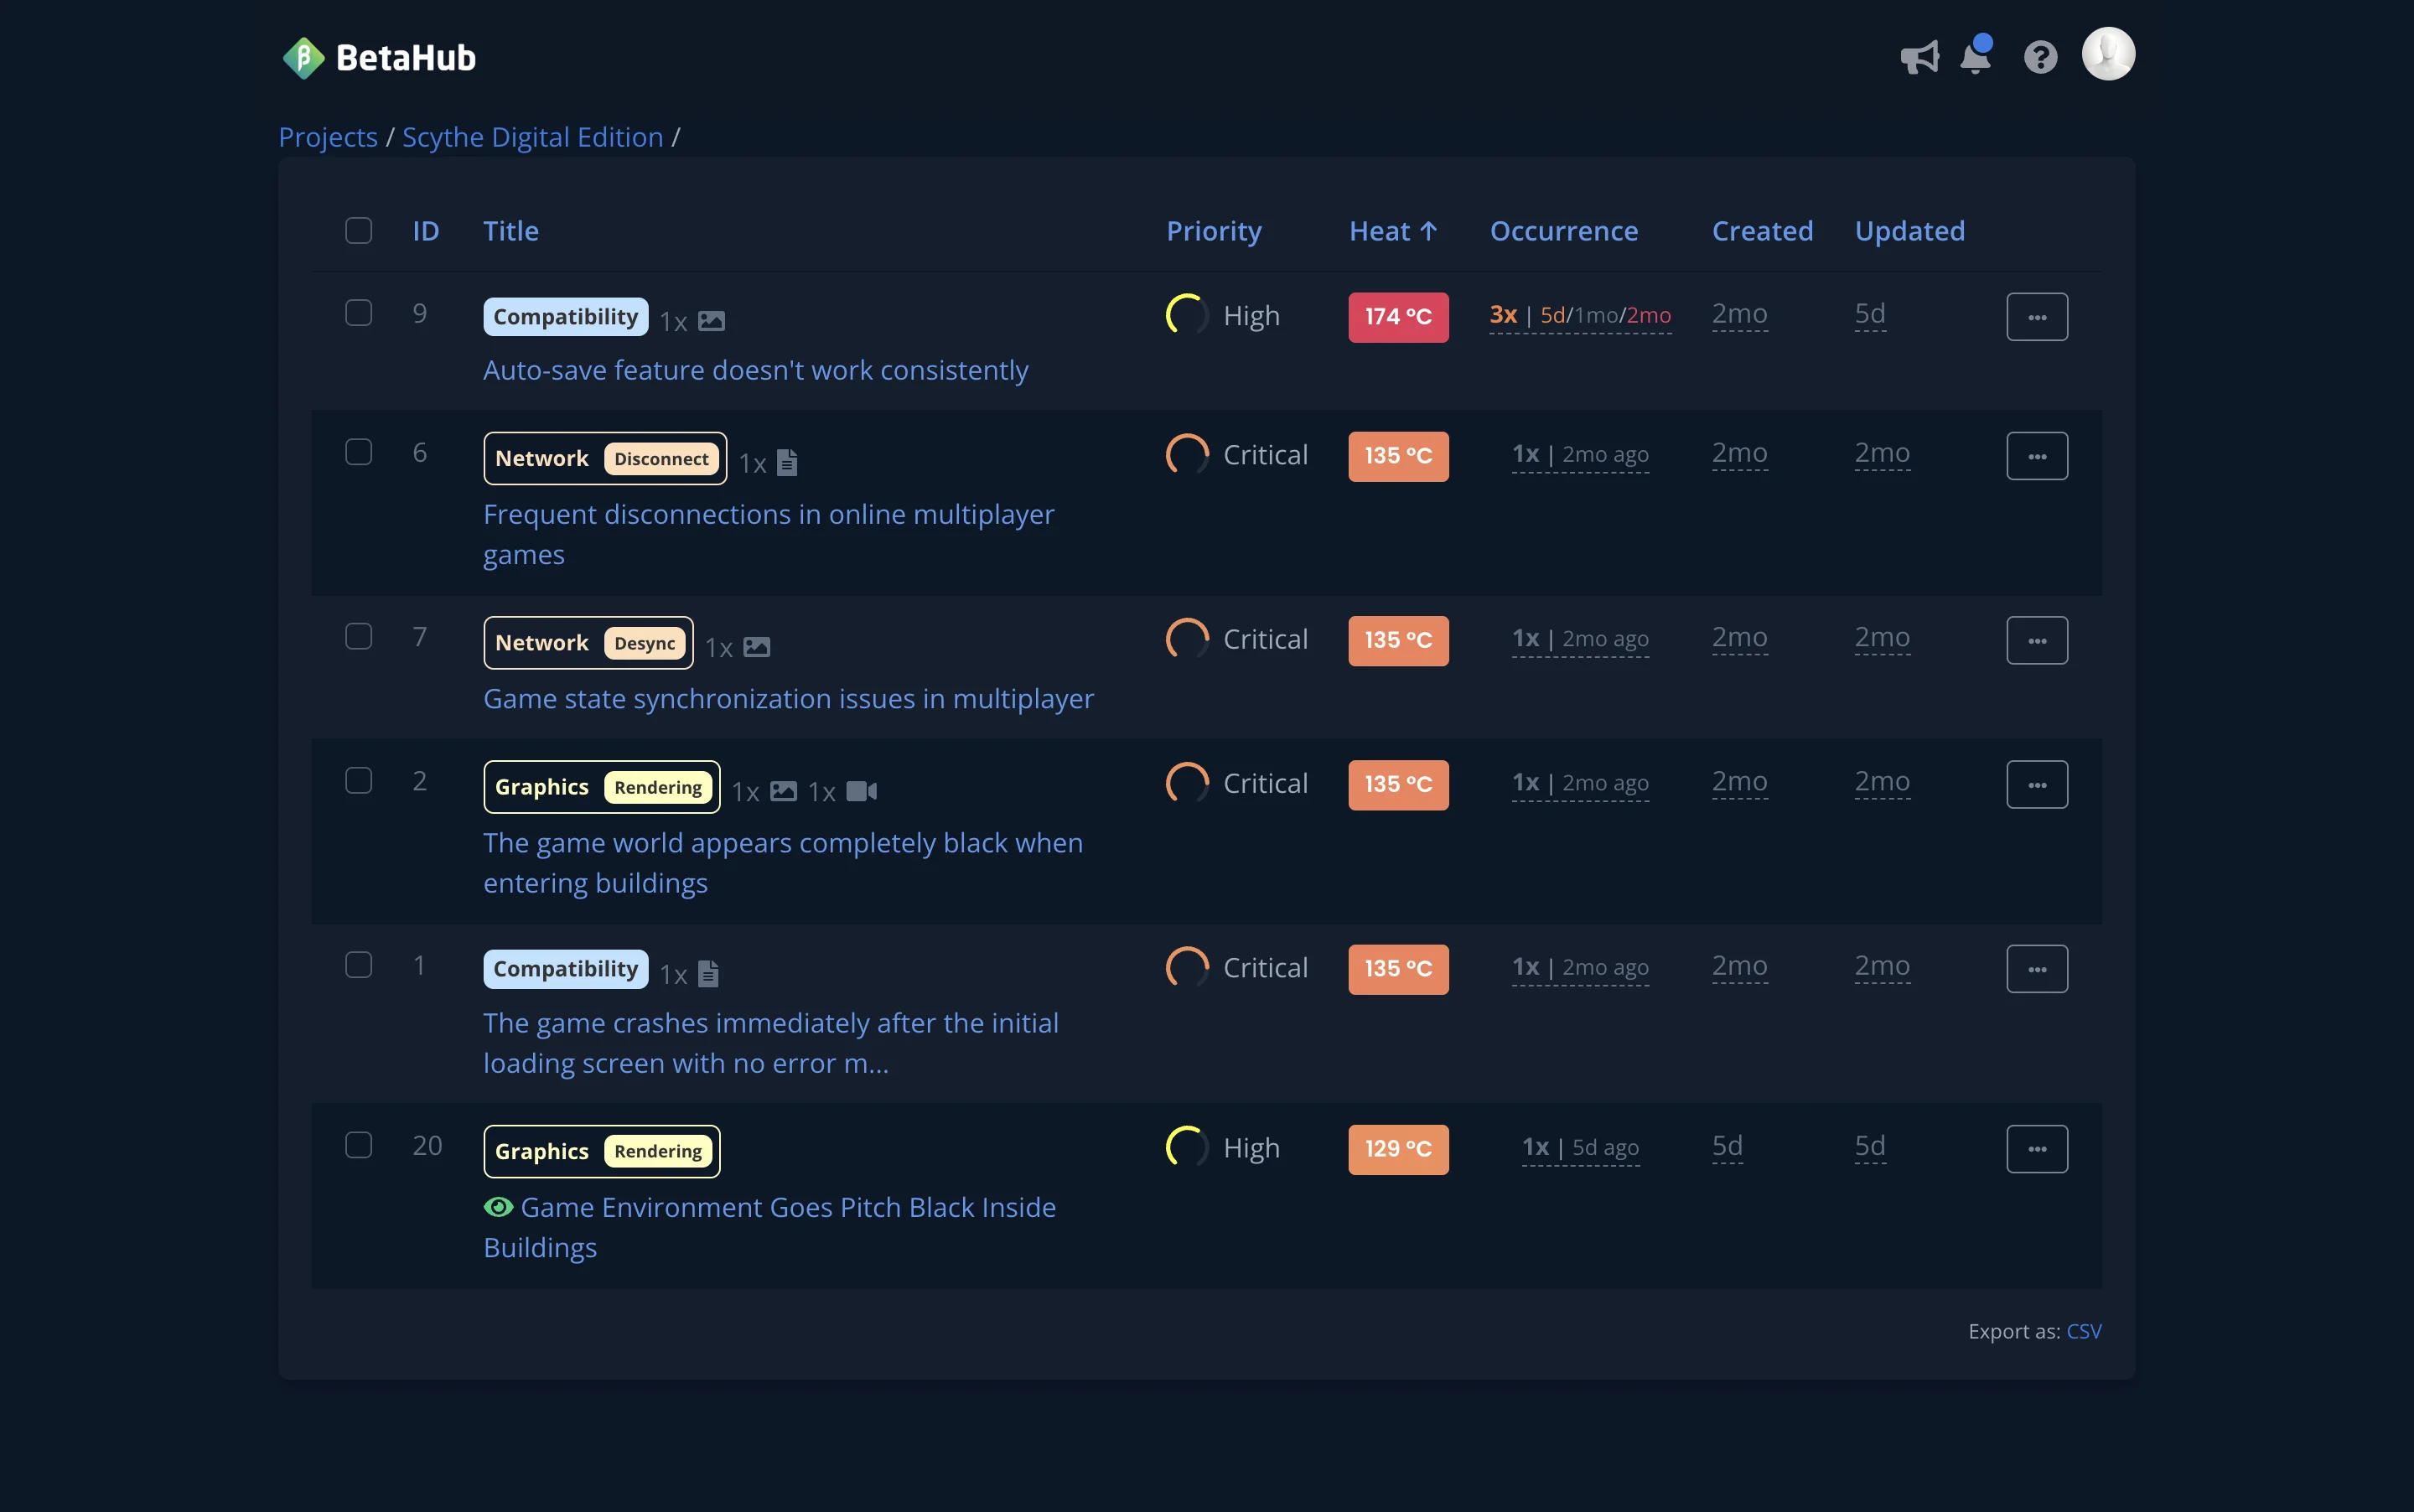
Issues (Bugs)
Track bugs through a complete lifecycle:
Open → In Progress → Needs More Info → Resolved → Closed
These are the default statuses. You can rename them or add custom statuses to match your workflow.
Key capabilities:
- Heat scoring – Issues with community reception (duplicates, watchers) naturally rise to the top
- Duplicate detection – Similar reports are linked together
- Custom fields – Collect project-specific data (game version, platform, etc.)
- Private comments – Leave internal notes visible only to your team and the reporter
- Quick assign – Assign issues to developers directly from the table view
- Move between projects – Move a bug, suggestion, or ticket to another project in your organization
- Retest Requests – Ask reporters to confirm a resolved fix actually worked, and collect structured replies
- Auto-archiving – Inactive issues archived automatically to keep lists clean
- Public Bug Board – Share a public bug list with voting, pinning, curation, and custom branding
- Public Suggestions Board – Share a public roadmap of community suggestions with voting and custom branding
- Team Identity & Privacy – Show your team to players as a shared persona or with role badges, across bugs, suggestions, and tickets
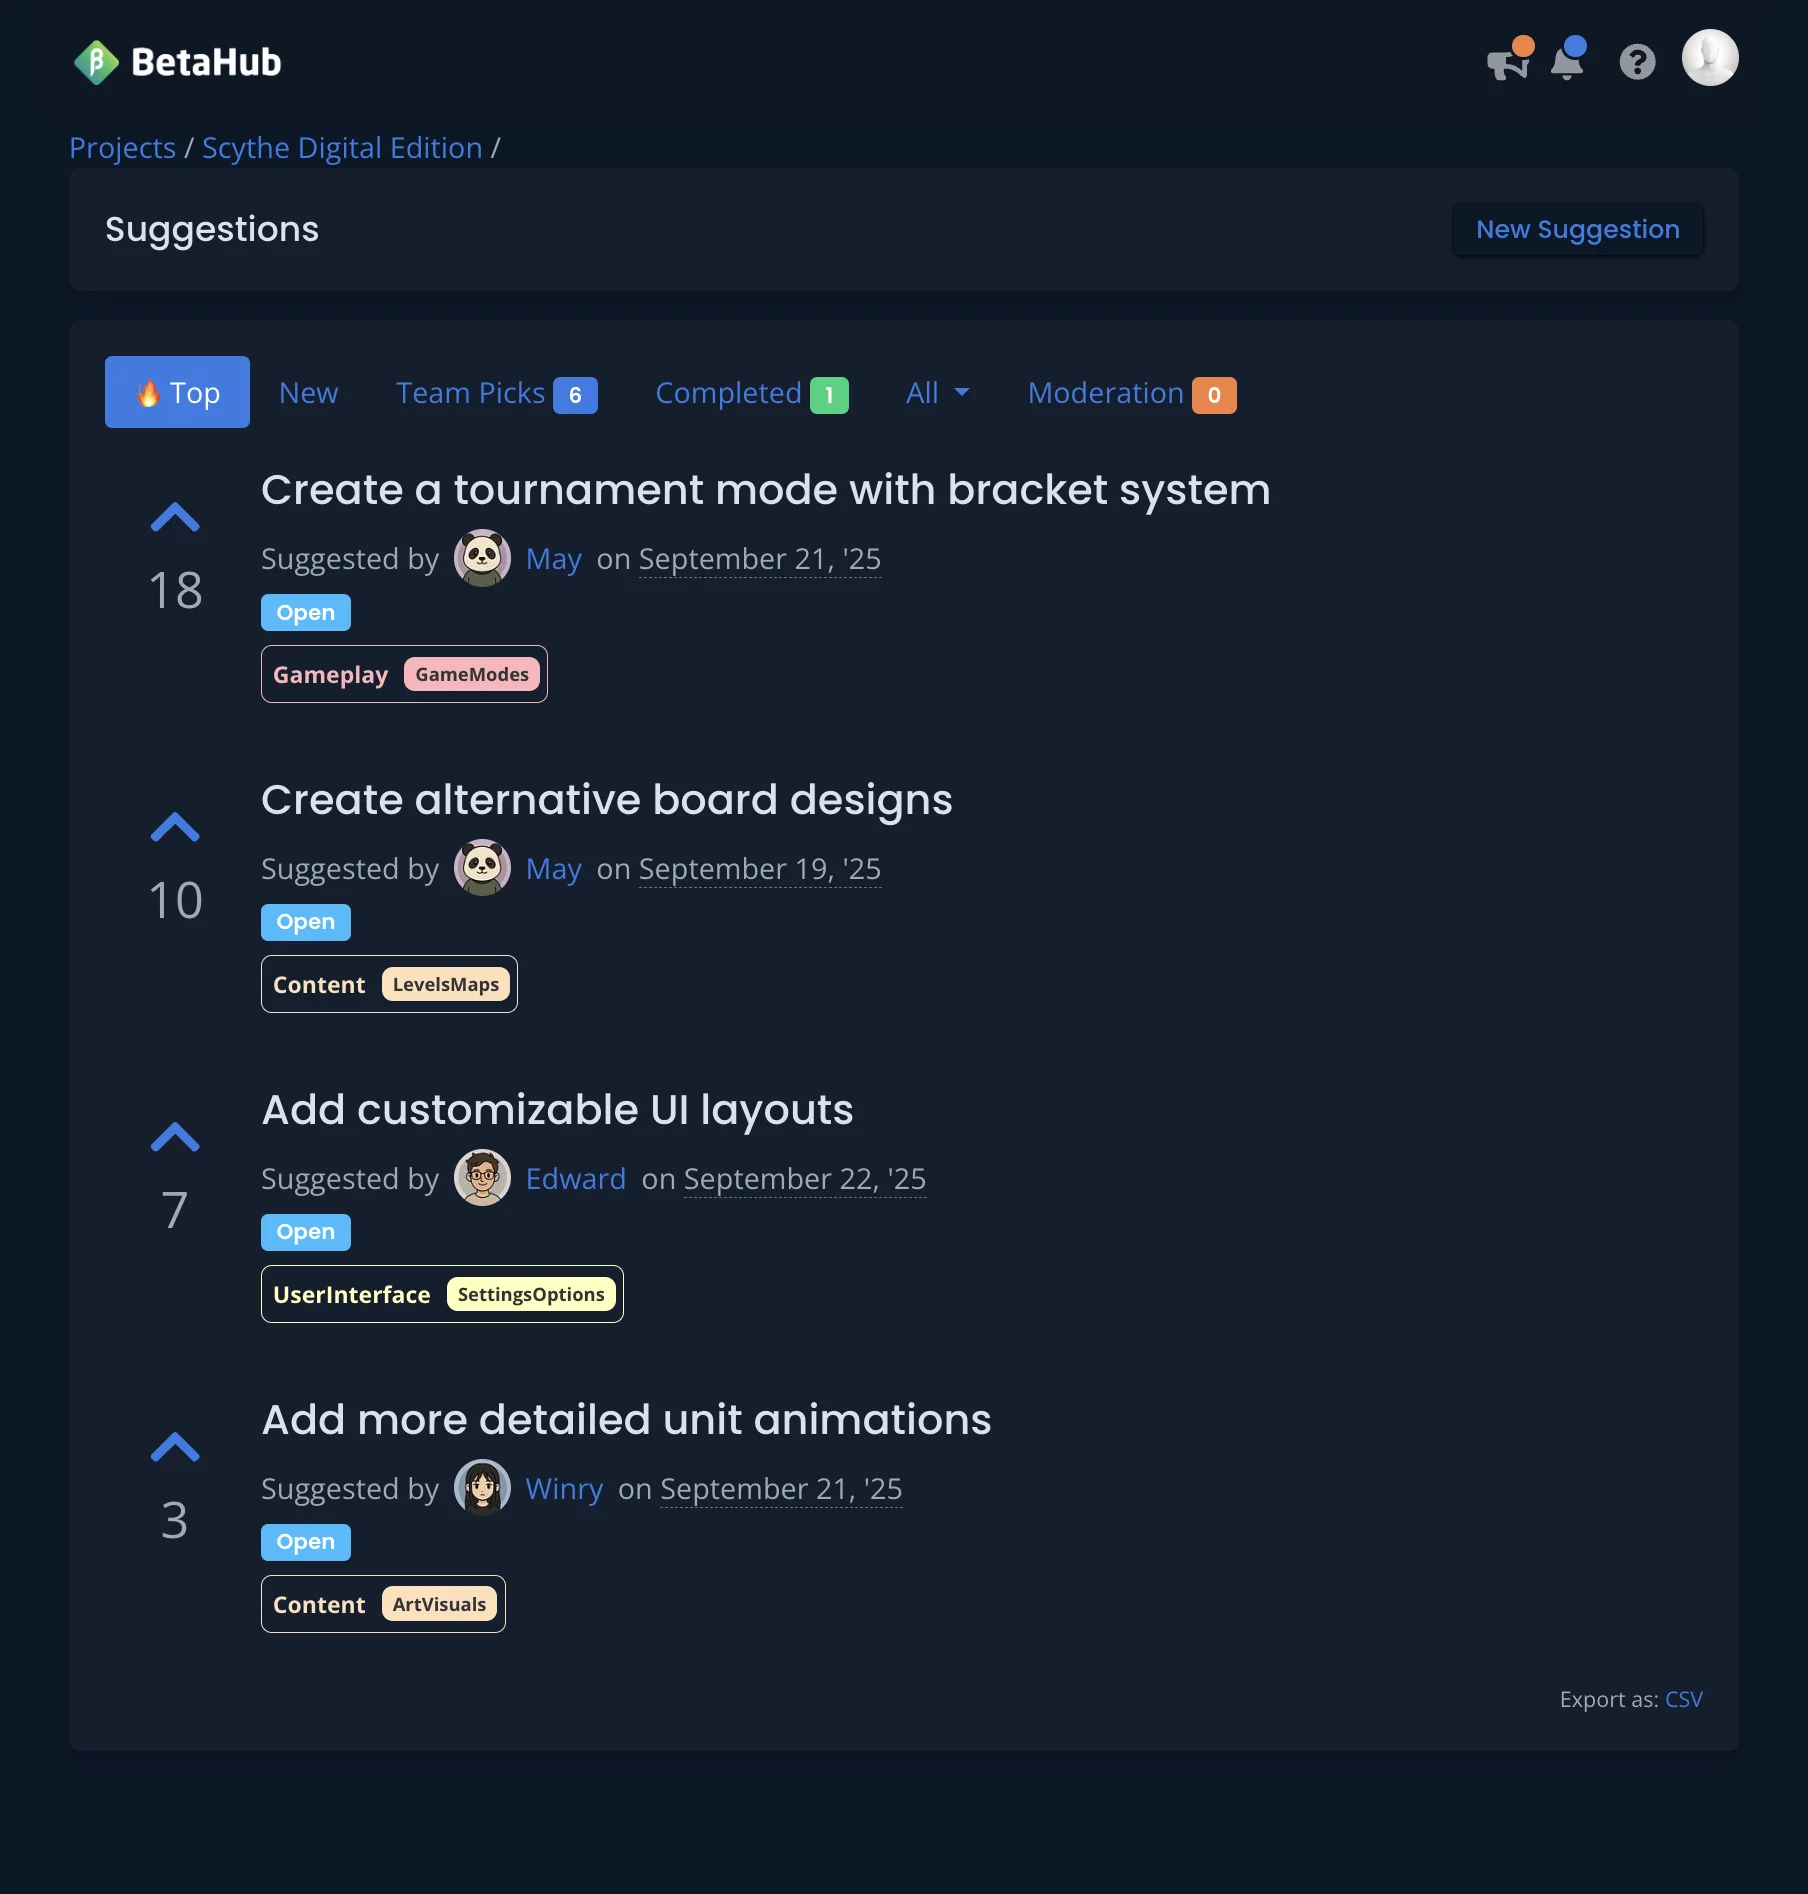
Suggestions
Let your community propose and vote on ideas:
- Public voting and comments (no account required to view)
- Status tracking: Open → Under Review → Planned → Completed
- Tag organization for roadmap planning
- Link duplicate suggestions together
- Move suggestions between projects in your organization
- Public Suggestions Board – Share a public roadmap (flat list or four-column view) with your community
Managing feedback as a developer →
Discord Integration
Turn your Discord server into a feedback hub:
| Command | Purpose |
|---|---|
/report |
Submit a bug report |
/suggest |
Submit a feature request |
/ticket |
Open a support ticket |
/ask |
Get answers from your knowledge base |
/install |
Interactive setup wizard |
Automation features:
- Listen Mode – AI detects feedback in chat and offers to submit it
- Bug Triage Queue – AI groups bug reports from Discord for team review before creating issues
- Forum integration – Automatically creates issues from forum threads
- Thread mode – Creates discussion threads for each report (public or private)
- Two-way sync – Status changes and comments sync between Discord and BetaHub
Additional capabilities:
- Release announcements when you ship new versions
- Welcome messages for new server members
- Roblox user verification (via Bloxlink or RoVer)
- Custom fields in submission dialogs
- Clickable buttons for bug reports, suggestions, and instant help
Full Discord Bot documentation →
Game Engine Plugins
Capture rich context automatically with in-game reporting:
- Screenshots – Capture and annotate the exact moment
- Video replay – Record gameplay leading up to the issue
- Log files – Attach engine logs automatically
- System info – Hardware specs, OS, game version
Supported engines:
- Unity (including WebGL)
- Unreal Engine
Game engine integration guide →
External Integrations
Connect BetaHub to your existing workflow:
Project Management:
- Jira, Asana, GitHub, Linear, ClickUp, Notion
Notifications:
- Webhooks for Slack, Teams, or custom tools
API:
- REST API with personal access tokens
- Webhook events for automation
See all integrations → · Webhook setup → · API access →
AI Capabilities
BetaHub uses AI throughout the platform:
| Feature | What it does |
|---|---|
| Title generation | Creates clear titles from user descriptions |
| Priority assignment | Sets priority based on severity and game context |
| Duplicate detection | Links similar reports automatically |
| Tag suggestions | Categorizes based on your tag structure |
| Automation rules | Follows up with reporters when attachments are missing |
| Bug triage | Groups Discord messages into bug candidates for team review |
| Support answers | Responds to common questions from your knowledge base |
| Template suggestions | Matches response templates to tickets based on content |
Support Knowledge Base
Build a knowledge base so AI can answer common questions automatically:
- Upload documentation (PDF, TXT, MD) or convert bug comments into articles
- AI searches your knowledge base before creating tickets
- Works in Discord (
/askcommand, bot @mentions) and web forms - Track which questions aren’t covered with knowledge gaps analysis
- V2 Agentic Search: An AI agent that reads and synthesizes answers from full documents — ideal for large documentation sites
- Web Spiders: Automatically crawl and keep external documentation in sync
Response Templates
Save and reuse pre-written reply snippets when responding to support tickets. Create shared templates for your team or personal ones just for you, with dynamic variables that fill in automatically. AI-powered suggestions match templates to incoming tickets.
Game Facts
Tell the AI about your game to improve accuracy:
- Game genre and core mechanics
- Critical vs. non-critical systems
- Custom terminology and jargon
- Priority rules specific to your project
Automation Rules
Define rules that automatically follow up with reporters when they haven’t uploaded required attachments:
- Trigger on specific AI-assigned tags (e.g., “crash” bugs)
- Wait a configurable delay before checking
- Send custom messages asking for logs, screenshots, or videos
- Delivered via Discord — reporters reply directly with attachments
Community Insights
Understand your community beyond individual bug reports.
Sentiment Analysis
Track how your community feels over time:
- Mood dashboard – See sentiment trends across channels
- Category breakdown – Excited, Positive, Neutral, Negative, Frustrated
- Top words – Identify what players are talking about
- Discussion topics – Auto-organize conversations by theme
Configure Sentiment Analysis →
Activity Feed
See everything happening in your project:
- Chronological log of all actions (submissions, status changes, comments)
- Filter by activity type, user, or date
- Track automated actions (Discord Bot, game form submissions)
- Available project-wide and per-issue
Learn more about Activity Feed →
Surveys
Ask your testers structured questions instead of only waiting for feedback to arrive:
- Build a questionnaire from rating scales, multiple choice, yes/no, free text, and more
- Send it to your testers and remind those who haven’t replied
- Share a public link so anyone can answer — signed in or anonymously
- Track a delivery funnel (sent, opened, completed) and read a per-question breakdown of every answer
Multimedia Support
Testers can attach rich media to any submission:
| Type | Formats | Max Size |
|---|---|---|
| Screenshots | PNG, JPG, JPEG | 10 MB |
| Videos | MP4, MOV, WEBM, AVI | 500 MB |
| Log files | TXT, LOG | 50 MB |
Screenshots include an annotation editor for highlighting issues. Log files can be automatically redacted to protect tester privacy – learn more.
Notifications
Stay informed about project activity:
- Email – Configurable alerts for new bugs, status changes, comments
- Discord DM – Direct messages from the bot
- Web – In-app notification center
Configure per-project notification preferences — from full silence to mentions-only to instant alerts — in your project notification settings.
Pricing
BetaHub offers plans for solo developers through large studios. Features like video recording duration, custom fields, and sentiment analysis vary by plan.
Next Steps
Choose your path:
For Developers:
- Getting Started – Set up your first project
- Project Setup – Configure roles, tags, and settings
- Integration Setup – Connect game engines and Discord
For Testers:
- Joining Projects – Find and join games to test
- Submitting Feedback – Report bugs and suggestions effectively
Reference:
- Quick Reference – Status tables, file formats, specifications
- Discord Bot – Complete Discord integration guide
- Advanced Features – Sentiment analysis, knowledge base, response templates, activity feed
- Bug Triage Queue – AI-powered pre-review queue for Discord bug reports
- Public Bug Board – Public bug board with voting, pinning, and curation
- Public Suggestions Board – Shareable public roadmap with voting
- NDA Management – Require testers to sign NDAs before contributing
- Surveys – Ask testers structured questions and read the results
- Account & Settings – Organizations, API access, security